Showing posts with label paper crafts. Show all posts

Wednesday, January 21, 2026

2025 with Search Magazine


Amid all my stresses of 2025 there were some good things on the writing front indeed thanks to Search Magazine!


It was a honor to have my previous Pamper Yourself at Home article chosen for the special Tenth Anniversary Issue! This reprint was expect along with a fun anniversary t-shirt. However the hefty package on my doorstep from Search was not. Inside was a beautiful plaque thanking me for my work at the magazine. It's not often art, DIY, and writing receive much recognition these days so it was a tremendous surprise to be noticed and appreciated for the little things I do. In fact, I should have written my thanks to the Search Magazine staff much sooner, but it's easy to let the pretty things fall to the wayside when so many dark things are currently happening.


Fortunately, my DIY pieces for Search keep my creative spirit afloat, and my Celestial Banner featured in the Fall #SunMoonStars Issue! There isn't always print space to include all my in progress photos, but more step-by-step albums are available on my Kbatz Krafts Facebook Page. Meta is not ideal, but I enjoy being able to share the process on Blue Sky, too. It's such a privilege to be able to maybe inspire others with affordable creations that anyone can do. This Winter #FamilyTime Issue, it was great fun to discuss the Legacy of Sewing and encourage others to focus on the important things together, one stitch at a time.


2026 looks to be another trying year already, but I'm tremendously grateful to have a full slate of Search deadlines to keep me on the writing ball.


Visit the Kbatz Krafts Archive for more projects featured in Search Magazine including: 


Autumn Chandelier

DIY Family Gallery

Vintage Trunk Makeover

Sewing on a Budget


Monday, January 12, 2026

Christmas Princess Upgrades


One expects changes as a child grows, which is why I don't usually go all out with the perfect finishes for my niece's Pastel Play Dresses. Such growth, however, is also an opportunity to upgrade our Christmas Princess with some ruffles, alterations, and new bling.


Having my first bout with Covid meant all my grandiose Fall sewing plans fell to the wayside, but these simple holiday embellishments have helped me get back into the crafting swing. Since its shape as a short caplet will not change, I starting by adding a gold fringe from a closing Joann Haul to the cape hem with a running back stitch using invisible thread. I knew I needed golden flair for my niece and shopped the Joann's clearance accordingly for some matching yellow threads handy now after pressing and pinning a cheap Wal-Mart gold satin as a shiny new cape lining. Unfortunately, I did struggle with tacking in this add-in lining numerous times. Like my long gestating brown housecoat set that I intended to have done before Covid struck, making sure the lining draped correctly with the cape took several adjustments both laying it flat and leaving it on the dress form before I was satisfied with several lining pleats in the back of the cape. Though I kept trying to convince myself it didn't have to be perfect, I also want this shiny fun to last for more holidays to come.


Next, a ritzy red fabric found at my local Goodwill this summer became a new foot long hem ruffle to lengthen the original Butterick B4319 tunic. They call me “The Woman in Black” there, and the store clerk asked me if it was a cape. I said I didn't think so but it was sparkly and that was what my niece said she wanted. I do have more of the original thrift Halloween capes from which I made the dress, but I'm saving that material for when I need to expand it with a new back panel or side gores. This ruffle took about half the glittery red; it's already cut width was just under doubling the hem length for the prerequisite gathering flounce. I did this new attachment by hand, for I didn't trust this slinky sheer metallic fabric to go through my sewing machine. Likewise, I initially stitched dollar store gold ribbon – the same as the silver trim used in the Cheap Frozen Costume – with my invisible thread at the original hem to further unite the two-tone reds. However, the invisible thread proved far too cumbersome by getting caught on the ribbon's metallic prongs so I went back to a yellow thread instead. I didn't double or line this deadstock mystery material for the ruffle, but did fold it over for shine on both sides upon expanding the dress sleeve with a fun little rectangular tippet. It was easy to open the gathering at the bicep and let the new tail drape, again with a gold Joann's trim setting off the new seam.


Like my Halloween Mystery Costume was meant to look like the personification of Halloween accumulated over time with its patchwork, this costume will indeed become piece by piece anew each Christmas. Obviously at some point it will no longer perfectly match, but the secret is making sure at least two items at a time coordinate. Here the red ruffle and the sleeve tippet go together. Next year I can stripe the top sleeve puff with more gold satin or do a matching full length sleeve – or gasp, add my niece's new favorite color: pink! Here the remaining gold sleeve trim was used for the drawstring of a little reticule purse. I could stripe this poof by stitching an alternating piece of the glittery red with the yellow satin, however these materials are both delicate and of different weights so that could look too wonky. Instead I simply laid the red strips horizontal on the yellow rectangle along with the last of the gold metallic hem trim and top stitched everything in place with a running back stitch. This turned out to be not exactly straight or symmetrical, but the top drawstring channel and the gathered closed bottom hide the imperfections. Yes, I could have been far more meticulous, but for a once a year use project like this, what would precision matter? This came together in a few hours, and the toughest part was trying to finagle the last of the gold fringe as some sort of tassel on the bottom that I ultimately left off to save for another future doodad.


Hot glue and clearance Wal-Mart yellow tulle made for an instant veil under the back poinsettias and bells of the existing Christmas wreath head roll in another simple yet oh so dramatic upgrade. I could have made a truncated hennin to go inside the roundlet, but my niece loves to precariously swing around my fifty cent pimp cane turned gnarly forest staff every chance she gets! Originally made for my Halloween Mystery Costume, this staff does double duty with my Mother Christmas Costume, so I decided to make my niece her own mini forest scepter more to her scale. A dollar store Halloween battery candle and empty tin foil roll combined with some backing cardboard, egg carton, and masking tape became the most magical yet cheapest make possible. Like my staff, stiffening hot glue creates that enchanted wood design as well as securing the egg carton strips around the faux candle flame like a mystical splintering effect. A black acrylic base coat and brown highlights finalized the branch motifs, and unlike my staff, this weekend project actually glows! I spoke to my niece on the phone during this multi step upgrade, telling her I was working on redoing her Christmas costume. “Thank you,” she said in her little five year old voice. I kept hearing this in my head thereafter, her appreciation spurring me on despite my lagging and any little imperfections or fudges and fixes along the way.


For Santa Lucia Day after saying, “Hi Kristin. Why are you dressed like that?” and “Who's Mother Christmas?” My niece grabbed her staff and said, “One of my own!” She kept running back and forth swishing the skirt and sleeves and refused to take her off dress for dinner. We had to compromised by letting her wear the cape at the table but she didn't want to share her scepter with her grandpop. My mother who taught me to sew (you can read my Legacy of Sewing article in the #FamilyTime issue of Search Magazine available now) was impressed with what looked like such a deceptively elaborate costume. The ruffle was actually a little long and the tie in the back was still loose enough for more room to grow. Had I gone straight through this project, it would have been done in a week but instead real world interference meant it took a month. However seeing her joy upon donning the costume, handing out the picture prints for others from inside her reticule, and waving her scepter about...this is why we do it amirite?


Follow the Kbatz Krafts Facebook for more photos or join us on Blue Sky for the latest craft adventures! Visit the Kbatz Krafts Archive for more projects including: 


Monday, January 15, 2024

Holiday Handprints!


Though inspired by readily available hand casting kits, I'm too cheap and ill-versed in such a medium to make a grandiose attempt at that kind of keepsake. Instead, I resorted to the simplest way to make some holiday child mementos: cardboard and paint.


The idea is quaint and sound – Christmas ornaments with my three year old great niece's hand print on them, four for each female relative. I always keep a few pieces of cardboard on hand (which became quite savvy to soak up after a water heater leak!) and cut a strip into squares. Using a glue stick it was easy to smoothly apply a holiday print fabric found in a Goodwill grab bag to the front side of the cardboard. The back I left clear for my niece's name and the date, because of course. Fortunately, there was just enough of this white and green wreath print to fit the three squares and one larger rectangle intended as an oversize, gift tag style ornament. Next came the hole punch for a rustic tie at the top, but some of these went through cleanly and others did not, leaving some corners delicate or in need of touch ups because I turned the squares to be upright, diamond style. Another shape like a heart or not exactly punching holes on the diamond point might have been better placement, but it was too late to turn back now! I knotted the twine securely before tying on several dollar store bells each. I thought about sprigs of greenery or festive florals, however that seemed a top heavy distraction when the forthcoming hand print was to be the focus. Instead, pipe cleaner curls in holiday red and green and recycled ribbon saved from other gift baskets became hot glued bows.


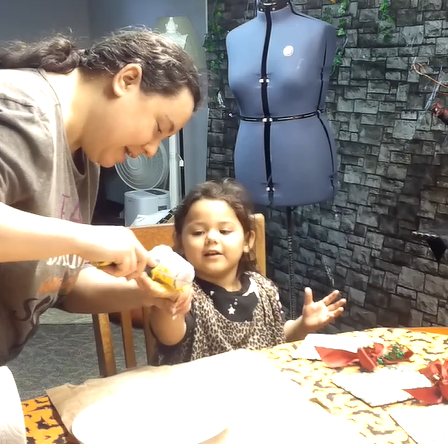
With the prep and decoration done, now it was time for the hand prints, with yellow as our chosen paint because it is my niece's current favorite color. (In these snapshots, you'll notice she is wearing my paint smock – a retired nightgown that I cut apart to draft its pattern before sewing it back together. Have I edited the six months worth of vlogs where I turned said pattern into a wearable nightgown mock up, satin nightgown, brown dress, and housecoat? No.) Trying to keep things from being too messy with a three year old, I poured the acrylic onto a paper plate and used a small roller on her hand, testing a few prints on some recycled packing paper scraps – which of course I saved and stuck on my corkboard as my holiday hand print! It took a few tries to make sure there was enough coverage and not a lot of globs between fingers, but then there was nothing to do but slap her little hand on the fabric and give it a moment press. I am so very tempted to try and do this with the pets, but with my temperamental cats I know better!


The oversize tag where I wrote the to and from for the jumbo present that my niece also wrapped unfortunately isn't my favorite. Purple was the only marker that showed on the fabric, and though it compliments the yellow, it looks too fuzzy to me. In hindsight, a darker fabric may not show through the cardboard so much and might have really let the subsequent yellow paint and any print pop. The cardboard for these ornaments will probably bend, and I wouldn't put them near hot holiday lights. Certainly, the found materials are cheap, but the captured moment is priceless. None of the receiving family members were worried about finite crafting, especially thanks to my exceptional wrapping and ribbon curled gifts presented by said niece. She drove in her Pumpkin Car, played with her Cardboard Castle – wondering why it didn't have a door? – and tried on some of the costumes in the Victorian Guest Room's costume closet. She said they were too big and I gave her an old Simplicity pattern catalog to mark all the costumes she wanted to make. I guess I need to get cracking now!


Granted this holiday write up is belated. I had originally intended to do this for Mother's Day 2023 just before the turbulence of the year really hit when one of the mothers who previous received my Memento Mori Sewing and deserved a hand print of her own unfortunately passed. As my own health declined, August birthdays also came and went so instead these hand prints became my only handmade gift for Christmas. It's nothing new, but fortunately, this one day, free, timeless idea can be for any occasion – birthdays, valentines, an egg print for Easter or leaves in the fall.


For more photos, follow Kbatz Krafts on Instagram or Facebook or visit our Archive for more including:


Cardboard Halloween Banner

Mother Christmas Costume

Autumn Riding Habit


Tuesday, November 14, 2023

Belated Cardboard Halloween Banner


Since May, this cardboard banner project has been laying on my basement studio floor in various configurations. 2023 has been a very tough year, and more crafts ended up piled on top of this recycled whimsy as at times I worked on it vigorously and other times it sat all but finished. Originally this was a little piece of Halloween for the Spring, but now it's a bemusing reminder of the October that wasn't.


Part of crafting is seeing something as not what it is but what it could be, and using recycled materials for holiday art is a great way to get into this mentality. I've been progressively trying to disguise some of the unsightly areas of my basement studio, and a Halloween banner seemed the perfect way to hide the top of the unfinished walls and put some cardboard to good use. People today always have a lot of boxes handy amirite? After measuring the wall where I wanted to place banner, I spent a day of trial and error cutting and geometry, initially intending for a double row of triangles. Unfortunately, the angles for a larger base with a smaller row of triangles on top became uneven for the fifteen feet length needed. After fighting more maths, using one large row won. I also realized thicker cardboard was too difficult to cut, and as I cut and traced numerous triangles per cardboard, I had to accept that none of the triangles were going to be precision perfect.


Cutting with various knives, rotary cutters, and scissors took longer than expected and really hurts your hand after awhile! Eventually, I had my number of triangles necessary, taped their ends together, and hot glued a backing cardboard strip across the banner for support. Now I was excited to get to the actual Halloween paper layer! Previously I used some of the craft store clearance Halloween Placemats ream in my Halloween Canvas Art, and I also found a $3 smaller cardstock ream at Goodwill. After going with orange, black, and white papers for a cohesive theme, I practiced laying out my sheets and marking the cardboard per paper so the same or similar papers were not near each other. The placemat paper was easier to fold and tape than the cardstock, and again it took a surprising amount of time hunched over and applying the paper with glue sticks and tape. Some of the square cardstock had to be cut on an angle to fit the triangle, and occasionally you can see that glare of piecing tape. However in working with cheap, found, piecemeal recycled materials, I again had to let go any perfection. Although, I probably made this seemingly simple project a lot more complicated than it had to be!


Dollar store orange tubing glued every third triangle became my hanging loops thumb-tacked into the beams where I wanted it to hide my basement ugly. I found out this is a charming little accent once I was able to finish said loops and actually hang this long gestating whimsy! I wanted to use the Halloween themed paper in my stash, but a more creative artist could probably paint custom design on their cardboard. I also think this is an excellent project for the family or classroom using holiday wrapping paper – reversible or embellished for any season! I still have the smaller triangles I cut out and would like to glue them onto the rest of the orange tubing for a more simple, free hanging banner, perhaps with leaves or florals to disguise more studio unsightly.


Despite minor imperfections and recycled materials, the possibilities are endless! Will it last longer than it took me to make it? Probably not. Is it totally cheap? Absolutely! Am I content with my found Halloween art? 110%.


Follow Kbatz Krafts on Instagram and Facebook for more Project Photos! 


Visit our Kbatz Krafts Archive for more crafts including:

Pot O Bones Tower

3D Skeleton Frames

Decorating Like Dark Shadows Video Series


Friday, January 6, 2023

It's a Cardboard Castle!


What do you do when you have a lot of big boxes but make a Cardboard Castle of course! I hadn't thought to do this for the family toddlers until I saw it on Pinterest, and I was hesitant because it seems...tacky? That wasn't going to stop me, however, and inspiration struck thanks to cottagecore painting and castle facades.


After a day of temporarily taping, assembling, cutting out windows, and configuring the roof; it took another day to hot glue all the seams. I added a cardboard floor for a sturdy base, and corners were reinforced with those extra cardboard corners shrewdly saved from other shipping. It's all surprisingly solid! Finishing the seams with masking tape and painting those joints brown while the rest of the walls were done in a white wash paint created a fun, medieval-esque interior. The paint job didn't have to be perfect and I could have gone into much more ye olde detail, but why go for broke on a recycled, temporary project that a child will ultimately out grow? The floor and roof lines were also painted brown to complete the look, embracing the bones of the building for what it's worth!


For the exterior I turned to the dollar store castle stone Halloween scene setter seen in my Using Halloween Scene Setters Everyday craft. (It's still hanging in my basement!) Wrapping the plastic around was just like a big Christmas present. The stone pattern is fairly forgiving so long as you pay attention to the roof angles and folded corners. I was probably unnecessarily fussy in making sure my clear tape lines were as taut as possible, but using tape instead of glue meant I can salvage the scene setter once the play castle has had it's day. Overall, this took about three and a half days between other holiday projects – an easy family to-do thanks to found materials and paints.


Older kids might enjoy decorating something like this themselves, and I may put a rug and a pillow inside to create a future reading nook. It all seems preposterous and short lived, yet the possibilities are endless!


For more progress photos, follow Kbatz Krafts on Facebook and Instagram! 


More Recycled Kbatz Krafts:

Cardboard Stained Glass Window

Cardboard Coffin

DIY Gothic Lantern

Pumpkin Car Makeover


Thursday, October 29, 2020

A Year in Kbatz Krafts aka 2020 🥴


Late last year, I put out a Kbatz Krafts survey for my work at HorrorAddicts.net, asking if the community not only enjoyed my Halloween crafts, but wanted to continue to see spooky DIY, goth sewing, and vintage upcycle crafts year round. When everyone said YES PLEASE, I kind of didn't know what to do. This January, I though a craft per month theme around a holiday, season, or event would be a good way to start. Masquerade Masks! DIY Flower Pens!


Then of course, you know, 2020 went to shit. I was in the middle of organizing my craft space and fixing up my basement with some Dark Shadows inspirations. So I went with it, deep diving into one project after another. From hot glue guns and a needle and thread to paint brushes and power tools, I documented everything at HorrorAddicts.net, doubling my content with DIY articles and step by step How-tos as well as Videos both standalone and 3, 4, or 5 part vlogs. This has been the most productive I've been since having had Lyme Disease, and while it's somewhat disappointing that this creative energy didn't manifest in the form of fiction and the completion of a novel like in those days of old; I strove on in my quirky, crafty endeavors if for nothing else but to keep me occupied from watching the rage inducing, scream worthy, and sob despairing news.


Here then is a rundown of this year's Kbatz Krafts to date – because most of them are Halloween (which begins on August, honestly) and I do still have a few tricks up my hand sewn sleeve for November and December. Blogger had to go and change it's format and be a dunce, of course because 2020, so if the pictures and videos don't work here, please click on the links for the spooky scoop.


Upgrading Masquerade Masks

Gothic Alterations & Thrift Finds

Strolling Through the Pine Barrens Tours

Goth Parasol Upgrade

DIY Flower Pens

Silver & Black Spider Ball Topiaries

Gothic Dark Shadows Mock Sconces

Decorating Like Dark Shadows Basement Series

How to Do Your Own Gothic Gallery Wall

The Unfinished Purple Modern Regency Sewing

Drab to Glam Lampshade Trimmings

DIY Halloween Repairs Video Series

How ~not~ to Make Mystical Glowing Orbs

Halloween Thrift Haul aka “Haulloween” and Trip 2

Halloween T-Shirt Pillows and Masks

Halloween 3D Canvas Art

Love is Love Rainbow Skeleton Wreath

His and Hers 3D Skeleton Frames

Mini Macabre Bone Wreath

Pot O' Bones Tower

Halloween Cat Shelter


This smorgasbord also led me to the equally technologically troublesome Instagram and a new Kbatz Krafts Facebook Page. Neither is the best resource, but I wanted to be able to have photos of my work somewhat organized and easy to find. I don't know that the masses are looking for any of it, but perchance you may also be inspired into discovering your own artful peace of mind. Or at least you can laugh at my admittedly totally crappy camera angles and cheap trash. I look at something and see not what it is, but what it should be.


Saturday, October 5, 2019

Halloween Crafts at HorrorAddicts.net!


It's that time of year again!

Time for Yours Truly to take over HorrorAddicts.net with another batch of How-to, Do It Yourself, Cheap and Loving It Kbatz Krafts!


October's burning Daylight Savings, so let's cut the fluff and get to all the crafts from this year and last because there's even MORE to come:


How to Make Cardboard Tombstones Video


Re-Purposed Black Topiaries
Halloween Candle Clusters
Yogurt Turned Ghost Candlesticks
Pumpkin Ottomans, Oh Yes


It's a Pumpkin Cat House (that the cat didn't like but at least I'm not bitter...)
Creepy Cloches
Tea Stained Labels and Spooky Bottles
How NOT to Make a Spooky Spell Book
How to Make Stuffed Pumpkins Video


Visit HorrorAddicts.net or join our Facebook Group for new and upcoming crafts and decoration conversations including:

DIY Cardboard Coffin
Mini Coffin Trays
Cardboard Tombstones Photo Shoot
When in Doubt, Paint it Black


Whew! We're NOT stopping until Thanksgiving, either, so stayed tuned for MOAR Podcasts and Audio Specials thankyouforyourtime.