Showing posts with label crafts. Show all posts

Monday, September 21, 2026

Autumnity Accessories! 🍂🍂


I received this grab bag of assorted enamel leaf pins as a gift and adore mixing and matching cascades of leaf pins on my hats and shoulders. However some of these adorable leaves were also broken and not totally my colors or style – so I decided to put them to good use as new brooches, hair clips, and more findings for complete autumnity delights!


Naturally the torti cat supervised as I sorted the pins, leaving the orange and maple leaf pairs that I already wore most as is. The more feather-esque designs, green leaves, and yellow charms were earmarked for new use as hat stick pins, alligator hair clips, and barrettes. Jewelry pliers made it easy to bend the original pin backs, sometimes I could even press them down to lock onto the new clips before hot glue did the rest. Surprisingly, Dollar Tree super glue that I usually use on metals didn't seem to work as well, but the hot glue created a smooth layer binding the unusual black leaves to gold jump rings for a sophisticated statement ring. A duplicate pair of orange maple leaves was re-purposed with new stud earring backs – although I did make them asymmetrical to go in different spots in my back ear piercings. Because, why not? The broken chestnut style leaves anchored two alligator clips alongside red oaks, again mismatched as sisters rather than twins in number and color. Four different colors and leaf shapes were combined on a larger pin back for one large brooch while two more single leaves became fun rings. Single maples became the stick hat pins before one larger barrette used up the last of the broken yellow leaves. Huzzah!


I prefer accessories to match, usually with one accent color per season. The similar reds and oranges maybe, but black and green and yellow at the same time?! Keeping these accessories as somewhat random leaves just looks a little more natural than if everything was absolutely coordinated. Besides, this helps me get out of my darker whimsy comfort zone and if they're in my hair, I don't have to look at them! If these were all accumulated, differently styled and textured pins, the look would be messy; but since they are all of the same enamel and theme, everything makes a statement together. Is wearing all of this all at once a bit too much for my bigely age? Maybe. Fortunately, the possibilities for an autumn hair accessory, brooch, and a ring are now endless. There's a certain illusion between what's a hat pin or a pin on the hat or multiple leaf pins together or just one leaf brooch, and I appreciate the double take when people notice something unusual in my hair and say I look “festive.” Since I had the glue gun at the ready, I also fixed several other broken accessories – including a black folding fan and white and red flower clips I usually put in my bun. Did I fix these summer pieces in time to use them with my Black and White and Red Dress? Of course not! A previous set of red and gold buttons that had been re-invented as hardly worn earrings, a pin, and a ring was also re-purposed as another barrette. A sliver from my Polka Dot Scrap Skirt likewise became a little Scrunchies hair tie. I thought about doing an even bigger one or a polka dot headband and barrette, however that did indeed seem too twee with all the gray infiltrating my hair.


Perhaps this is a silly write up; I feel the need to explain how I did these risk free accessories despite this being a simple have glue gun, will travel day project the whole family can do together. As I wrote in my forthcoming DIY Jewelry column in the #EverydayMagic Fall issue of Search Magazine, go ahead and put a pin back on anything. Is it cheap and tacky? Absolutely! Do I believe nothing is too cheap or so basic a DIY? Also absolutely – because it is customized by and for you and that's worth celebrating. There's no reason not to bling it up with the autumnity vibes. The term “autumnity” itself means “the quality or condition that is characteristic of autumn” and it needs to come back into the mainstream lexicon ASAP.


Join me on Blue Sky for more or visit Kbatz Krafts on Facebook and Instagram for more project photos and more jewelry shenigans including:


White Jewelry Bling

DIY Holiday Jewelry

Black and White Bobbles


View more of my recent autumnity appearance at the Hit the Stars Learning with Horses Apple Festival! 🍂😁🎃🐴


"Oh yeah, you blend." 🤣


Friday, January 30, 2026

The Lemon Dress


I couldn't wait to dive-in making something for my yellow loving niece upon snagging three pre-cut yards of this fun fabric labeled “Mediterranean Lemons.” They were a whopping 25 cents each clearance at Walmart! However, since I was unsure of the cotton quality or the true cut material amount, I decided to keep it simple and use the same Purple Princess Tunic Butterick B4319 pattern to sew a pleasant spring dress.


The trouble with this kind of cheaper material from a place like Walmart is that they are single yards folded on small card displays. No matter how much I steamed, pressed, and ironed; the fold lines were still apparent. I also laid out the yards end to end as one piece when considering my pattern cut 2 back and on the fold front. This is a busy pattern so I wasn't concerned with matching at the seams. However, if you do need to perfectly match materials on a larger project, this kind of cheap pre-cut material probably won't work. This is the difference between non-fabric stores such as Walmart and now the overwhelmed crafter Michael's playing wannabe Joann. They attempt to sell fabric when neither has the proper sales storage, yard cutting, or quality materials for the experienced sewer expecting more or the would-be sewing turned discouraged consumer. For kids play clothes this fabric works – but I don't know that I would have paid full price for this material knowing the Wal-Mart shortchanges. Anyway, fin rant and R.I.P Joann.


Like one of the previous purple tunics, I cut this pattern with an open back seam for an elastic waist gathering. I compared the original tunic which was too big at the time against the pattern and my own paper pattern creation of my niece's current measurements. With these three pre-cut yards, there wasn't enough material width to do an all-in-one sleeve as the original pattern calls for, and I think I initially left too much excess in the shoulder line because of this. Fortunately I could correct that once I saw where my new puffy sleeve additions had to be set. These six inch poofs were the leftover cuts from the bottom of my lemon yards, gathered with an elastic channel at the bicep and then pleated into the armscye. A delicious light teal lace from a thrift grab bag added more length and flutter to the sleeve as well as the collar, waist, and hem. I've been working thru this goofy bag of pastel laces on all my niece's creations! While the hem and collar were just the lace ruffle as is, the lace was straight stitched at the elastic waist channel before I did the gather through – giving the skirt portion an extra flouncy oomph once it was all cinched.


Inspired, I decided to use the roundish shoulder cut-out scraps for a little reticule drawstring purse as last seen in my Christmas Princess Upgrade. Although I didn't expect to use all three yards, I also want to maximize every piece of material. Unfortunately, I thought I could use the neckhole scraps to make the crown of a subsequent matching bonnet but they were too small. Instead I took a round and folded over strip from the third untouched yard for the hat top and its double sided gathered floppy brim. The teal lace again set off the little hat as well as the drawstring channel of the purse. Deep in my craft drawers I found an old teal satin ribbon roll that came in handy for the reticule tie and a bonnet strap. C'est adorable!


Strangely I went out of order on this project, doing the small hand sewn accessories before finishing the dress seams and straight machine stitching. Plans to do this earlier in December were of course delayed and it came down to the holiday wire buckling down for two days to get it all done. Somewhere I think I may have doubled the waist measurement when I didn't need to do so, as the dress looks a little too big. Fortunately – or unfortunately – there's room to grow and time to like it. For upon seeing these Mediterranean Lemons on Christmas Day, my niece promptly said, “I hate it.” 


Visit Kbatz Krafts on Facebook for more photos or follow us on Blue Sky for the latest craft adventures! Peruse the Kbatz Krafts Archive for more projects including: 


Wednesday, January 21, 2026

2025 with Search Magazine


Amid all my stresses of 2025 there were some good things on the writing front indeed thanks to Search Magazine!


It was a honor to have my previous Pamper Yourself at Home article chosen for the special Tenth Anniversary Issue! This reprint was expect along with a fun anniversary t-shirt. However the hefty package on my doorstep from Search was not. Inside was a beautiful plaque thanking me for my work at the magazine. It's not often art, DIY, and writing receive much recognition these days so it was a tremendous surprise to be noticed and appreciated for the little things I do. In fact, I should have written my thanks to the Search Magazine staff much sooner, but it's easy to let the pretty things fall to the wayside when so many dark things are currently happening.


Fortunately, my DIY pieces for Search keep my creative spirit afloat, and my Celestial Banner featured in the Fall #SunMoonStars Issue! There isn't always print space to include all my in progress photos, but more step-by-step albums are available on my Kbatz Krafts Facebook Page. Meta is not ideal, but I enjoy being able to share the process on Blue Sky, too. It's such a privilege to be able to maybe inspire others with affordable creations that anyone can do. This Winter #FamilyTime Issue, it was great fun to discuss the Legacy of Sewing and encourage others to focus on the important things together, one stitch at a time.


2026 looks to be another trying year already, but I'm tremendously grateful to have a full slate of Search deadlines to keep me on the writing ball.


Visit the Kbatz Krafts Archive for more projects featured in Search Magazine including: 


Autumn Chandelier

DIY Family Gallery

Vintage Trunk Makeover

Sewing on a Budget


Friday, January 16, 2026

DIY Holiday Adventures


Still catching up post-Covid, I didn't get to all the DIY December ideas on my list this year. No scrap ornaments nor holiday banners like my Celestial Banner for Search Magazine! What I did do came down to the wire, and the reactions to this trio of festive projects were...mixed?


The Jewelry Treasure Chest

I saved this top opening gift basket several years ago but forgot what I had wanted to do with it – until I saw it again this year, that is! I thought the flip top made it the perfect treasure chest for my niece. She's been sorting through some of my jewelry making supplies for the beads she likes, so I made as many bracelets and necklaces as I could with her favorites, the pink bead discards I don't like, and all the odd, low quantity, fun beads that don't match anything else. Many of the bug and butterfly charms and unique bobbles came from three cases of beads I found at Goodwill earlier in the summer for $8 each. Unlike some of my seemingly elaborate Black and White Bobbles, these were all done with simple elastic cording that can grow with her or can be taken apart later if she wants to do her own creations. More plastic Mardi Gras necklaces and fake pearls removed from other cheap costumes supplemented the chest along with her play masks, tiaras, and folding fans. I also put some of the jewelry sets I made in smaller boxes or little velvet bags within the chest to make them seem even more fancy. This was seemingly the biggest hit of the holiday when my niece didn't want to open anything else on Christmas morning because she had to go through the entire chest claiming she wanted to wear twenty pieces at once. Unfortunately, she only wanted the pink and later red jewelry – refusing to consider any other color even when playing with the mask and fan. So... I guess it was worth it?


Potter Scrap Pumpkins!

I got a pair of Gryffindor pajama pants for my husband that turned out to be quite long. Upon hemming them, I saved the excess inches intending to make something, but what? Once I knew making personalized scrap ornaments for each of my family wasn't feasible this holiday season, I realized I could still at least make Stuffed Pumpkins for my older niece with these pant ends. Once upon a time she was a big Potter lover, but this print is mature and subtle enough to just be regular autumn décor without screaming boy wizard. One end is gathered closed before the stuffing with fabric scraps and plastic bags. Rustic twine for the pumpkin sections, dollar store leaves, curly pipe cleaner vines, and a cinnamon stick stem topped off this gourdy pair. Upon seeing them on Christmas Eve, my niece first asked where I got the fabric and if they had been worn before they were pumpkins? Which I guess I could see as humorous because they hadn't been, and likewise, they weren't stuffed with dryer lint – although that is a perfectly viable stuffing option in a pinch. All gathered were very bemused and said that I was a very resourceful person. I'm not sure, however, if that resourceful was meant as a positive or just being polite, for I was also teased for saving all the holiday package shipping paper. Hey, man, it's good for painting drop cloths and scrap sewing patterns!


It's a Christmas Vacation Pillow

I get my husband a lot of character shirts at the thrift shop that he may like until they wear thin but sometimes the sizes aren't right. Usually I give away the too bigs and too smalls immediately or make pillows for the bean bag. This National Lampoon's Christmas Vacation shirt, however, I found again wrapped around loose ornaments when I opened my ornaments tote bin this year – meaning I must have intended to make it a pillow last year. Fortunately, unlike my Wonky Halloween Pillows, this was in good condition and easy to cut out the design square before running it through the machine. Again scraps and plastic bags were my stuffing – this is only a decorative pillow rather than needing to be soft and cozy. Its hockey playing Santa pillow companion was an earlier upcycled thrift find – I only have two Santas in my house and both are left shooting hockey players! There are more ready to retire shirts that I would like do as a quilt like my Memento Mori piece, but only my husband would probably get all the pop culture shirt references, for no one seemed to get, care, or notice the Christmas Vacation quote on the pillow. Oh well. Thankfully, everyone did eat all the pizzelles of course.


Visit Kbatz Krafts on Facebook for more photos or follow us on Blue Sky for the latest craft adventures! Peruse the Kbatz Krafts Archive for more projects including: 


Carving and Baking with Real Pumpkin

Mini Pumpkin Garland

Going Green Jewelry


Monday, January 12, 2026

Christmas Princess Upgrades


One expects changes as a child grows, which is why I don't usually go all out with the perfect finishes for my niece's Pastel Play Dresses. Such growth, however, is also an opportunity to upgrade our Christmas Princess with some ruffles, alterations, and new bling.


Having my first bout with Covid meant all my grandiose Fall sewing plans fell to the wayside, but these simple holiday embellishments have helped me get back into the crafting swing. Since its shape as a short caplet will not change, I starting by adding a gold fringe from a closing Joann Haul to the cape hem with a running back stitch using invisible thread. I knew I needed golden flair for my niece and shopped the Joann's clearance accordingly for some matching yellow threads handy now after pressing and pinning a cheap Wal-Mart gold satin as a shiny new cape lining. Unfortunately, I did struggle with tacking in this add-in lining numerous times. Like my long gestating brown housecoat set that I intended to have done before Covid struck, making sure the lining draped correctly with the cape took several adjustments both laying it flat and leaving it on the dress form before I was satisfied with several lining pleats in the back of the cape. Though I kept trying to convince myself it didn't have to be perfect, I also want this shiny fun to last for more holidays to come.


Next, a ritzy red fabric found at my local Goodwill this summer became a new foot long hem ruffle to lengthen the original Butterick B4319 tunic. They call me “The Woman in Black” there, and the store clerk asked me if it was a cape. I said I didn't think so but it was sparkly and that was what my niece said she wanted. I do have more of the original thrift Halloween capes from which I made the dress, but I'm saving that material for when I need to expand it with a new back panel or side gores. This ruffle took about half the glittery red; it's already cut width was just under doubling the hem length for the prerequisite gathering flounce. I did this new attachment by hand, for I didn't trust this slinky sheer metallic fabric to go through my sewing machine. Likewise, I initially stitched dollar store gold ribbon – the same as the silver trim used in the Cheap Frozen Costume – with my invisible thread at the original hem to further unite the two-tone reds. However, the invisible thread proved far too cumbersome by getting caught on the ribbon's metallic prongs so I went back to a yellow thread instead. I didn't double or line this deadstock mystery material for the ruffle, but did fold it over for shine on both sides upon expanding the dress sleeve with a fun little rectangular tippet. It was easy to open the gathering at the bicep and let the new tail drape, again with a gold Joann's trim setting off the new seam.


Like my Halloween Mystery Costume was meant to look like the personification of Halloween accumulated over time with its patchwork, this costume will indeed become piece by piece anew each Christmas. Obviously at some point it will no longer perfectly match, but the secret is making sure at least two items at a time coordinate. Here the red ruffle and the sleeve tippet go together. Next year I can stripe the top sleeve puff with more gold satin or do a matching full length sleeve – or gasp, add my niece's new favorite color: pink! Here the remaining gold sleeve trim was used for the drawstring of a little reticule purse. I could stripe this poof by stitching an alternating piece of the glittery red with the yellow satin, however these materials are both delicate and of different weights so that could look too wonky. Instead I simply laid the red strips horizontal on the yellow rectangle along with the last of the gold metallic hem trim and top stitched everything in place with a running back stitch. This turned out to be not exactly straight or symmetrical, but the top drawstring channel and the gathered closed bottom hide the imperfections. Yes, I could have been far more meticulous, but for a once a year use project like this, what would precision matter? This came together in a few hours, and the toughest part was trying to finagle the last of the gold fringe as some sort of tassel on the bottom that I ultimately left off to save for another future doodad.


Hot glue and clearance Wal-Mart yellow tulle made for an instant veil under the back poinsettias and bells of the existing Christmas wreath head roll in another simple yet oh so dramatic upgrade. I could have made a truncated hennin to go inside the roundlet, but my niece loves to precariously swing around my fifty cent pimp cane turned gnarly forest staff every chance she gets! Originally made for my Halloween Mystery Costume, this staff does double duty with my Mother Christmas Costume, so I decided to make my niece her own mini forest scepter more to her scale. A dollar store Halloween battery candle and empty tin foil roll combined with some backing cardboard, egg carton, and masking tape became the most magical yet cheapest make possible. Like my staff, stiffening hot glue creates that enchanted wood design as well as securing the egg carton strips around the faux candle flame like a mystical splintering effect. A black acrylic base coat and brown highlights finalized the branch motifs, and unlike my staff, this weekend project actually glows! I spoke to my niece on the phone during this multi step upgrade, telling her I was working on redoing her Christmas costume. “Thank you,” she said in her little five year old voice. I kept hearing this in my head thereafter, her appreciation spurring me on despite my lagging and any little imperfections or fudges and fixes along the way.


For Santa Lucia Day after saying, “Hi Kristin. Why are you dressed like that?” and “Who's Mother Christmas?” My niece grabbed her staff and said, “One of my own!” She kept running back and forth swishing the skirt and sleeves and refused to take her off dress for dinner. We had to compromised by letting her wear the cape at the table but she didn't want to share her scepter with her grandpop. My mother who taught me to sew (you can read my Legacy of Sewing article in the #FamilyTime issue of Search Magazine available now) was impressed with what looked like such a deceptively elaborate costume. The ruffle was actually a little long and the tie in the back was still loose enough for more room to grow. Had I gone straight through this project, it would have been done in a week but instead real world interference meant it took a month. However seeing her joy upon donning the costume, handing out the picture prints for others from inside her reticule, and waving her scepter about...this is why we do it amirite?


Follow the Kbatz Krafts Facebook for more photos or join us on Blue Sky for the latest craft adventures! Visit the Kbatz Krafts Archive for more projects including: 


Friday, September 26, 2025

Black and White Bobbles!


In addition to my Black and White Polka Dot Dress, I made more assorted black and white bling – bang for my buck that looks a lot more classy and sophisticated than for what these totally cheap jewelry sets actually cost.


First came the seventy-five cent clearance cameos from one of my spring Joann Closing Hauls. I was finally able to utilize some flat black faceted beads in addition to dangling black bobbles and cheap gold beads that came from either a thrift grab bag or beaded holiday garland that I cut up for the beads. I don't remember which! The cameos made for earrings, a necklace pendant, and a bracelet with a small dangling cross to match. Obviously nothing here is more than plastic yet it's a posh looking set that adds instant elan to any little black dress.


Next I made two odd, ball style sets by supplementing a handful of unique but low in quantity beads. Two random white fireballs were done up with gold crosses for a pair of earrings shiny enough to match some of my heirloom pearl and gold pieces. More creamy pearl-esque balls of several assorted sizes combined with more cheapy black and gold beads for a full suit of earrings, necklace, and a sideways cross bracelet. These faux pearl beads ended up being very tricky thanks to a very small threading hole, forcing me to use a lesser gauge beading wire for the necklace. I have trouble crimping the ends of such wire properly, thus I generally just twist, knot, and wrap the wire but it always seems to hold. Jinx! When I wore this graduated ball set, my dad asked why I was dressed so fancy. I said, “Thanks. I made it!”


All of these random grab bag beads came from the sadly now closed local Carnival of Collectables Antique Mall and have been in my stash for sometime. In my previous Bling Binge, I was trying to use as much of my stash as possible to make jewelry sets whether they were in my seasonal colors and wearing window or not. Here however, I used miscellany pieces to make what I wanted and needed right now – filling in gaps with black, white, and gold that I only wear in August. Regardless of outdated Victorian and Edwardian classism, I don't believe in wearing white after Labor Day. It's autumn people move on to fall colors! Of course, that's not going to stop me continuing to use up many of my black bobbles as well as the black wood bead garland seen in my Haulloween 2024 video.


Simply cutting this bead garland strand made for a long, opera length necklace before a matching bracelet and ear bobs. In contrast to the imitation pearls, because these string holes are so large, I was also able to use up some smaller millimeter beads to finish the earrings and prevent the larger beads from sliding off the ear wire. Because who doesn't need more black wood bead necklaces, I continued with a smaller collar style necklace – this time alternating with other black beads for a tone on tone set again with a matching bracelet. Next, leftover silver Christmas garland beads combined with more of the wooden beads made for a sophisticated cross necklace set. Finally it was time for some large plastic gold beads with the black wood beads, matching dangling earrings, and a cross bracelet. Whew!


Believe it or not, I still have MOAR of the black wood beads, and I'm tempted to experiment in alternating them with more autumn colored beads. September was formerly my time to wear red (a color understandably retired for political reasons), but moving up silver and black or all black in chunky, cool tone sets goes well with this transitional weather, crisp black and white buffalo check scarf, or my black and white plaid skirt. I love thinking outside the box in making accessories that go with any outfit or season but don't break the bank. The most expensive materials here were probably the elastic cordings, beading wire, and earring hooks that a jewelry maker should always buy in bulk and have on hand for when colorful inspiration strikes.


Visit Kbatz Krafts on Blue Sky for more crafting or follow our Facebook and Instagram for project photos. Revisit the Kbatz Krafts Archive for more bobbles including:


Green Holiday Jewelry

Jaunty Autumn Hat

Jewelry Making Basics

Drab to Glam Lampshades


Tuesday, July 1, 2025

Making a Minecraft Ottoman


My Husband may not want more pillows for the office bean bag (spoiler alert: he got them!). However he does need an ottoman under his desk to alleviate the 9 to 5 leg fatigue as well as the work-from-home perils of cats determined to be in his lap making for some surprisingly uncomfortable positioning. Now at last, my Stuffed Pumpkin Ottoman expertise can be put to good use thanks to some Minecraft themed fabric!


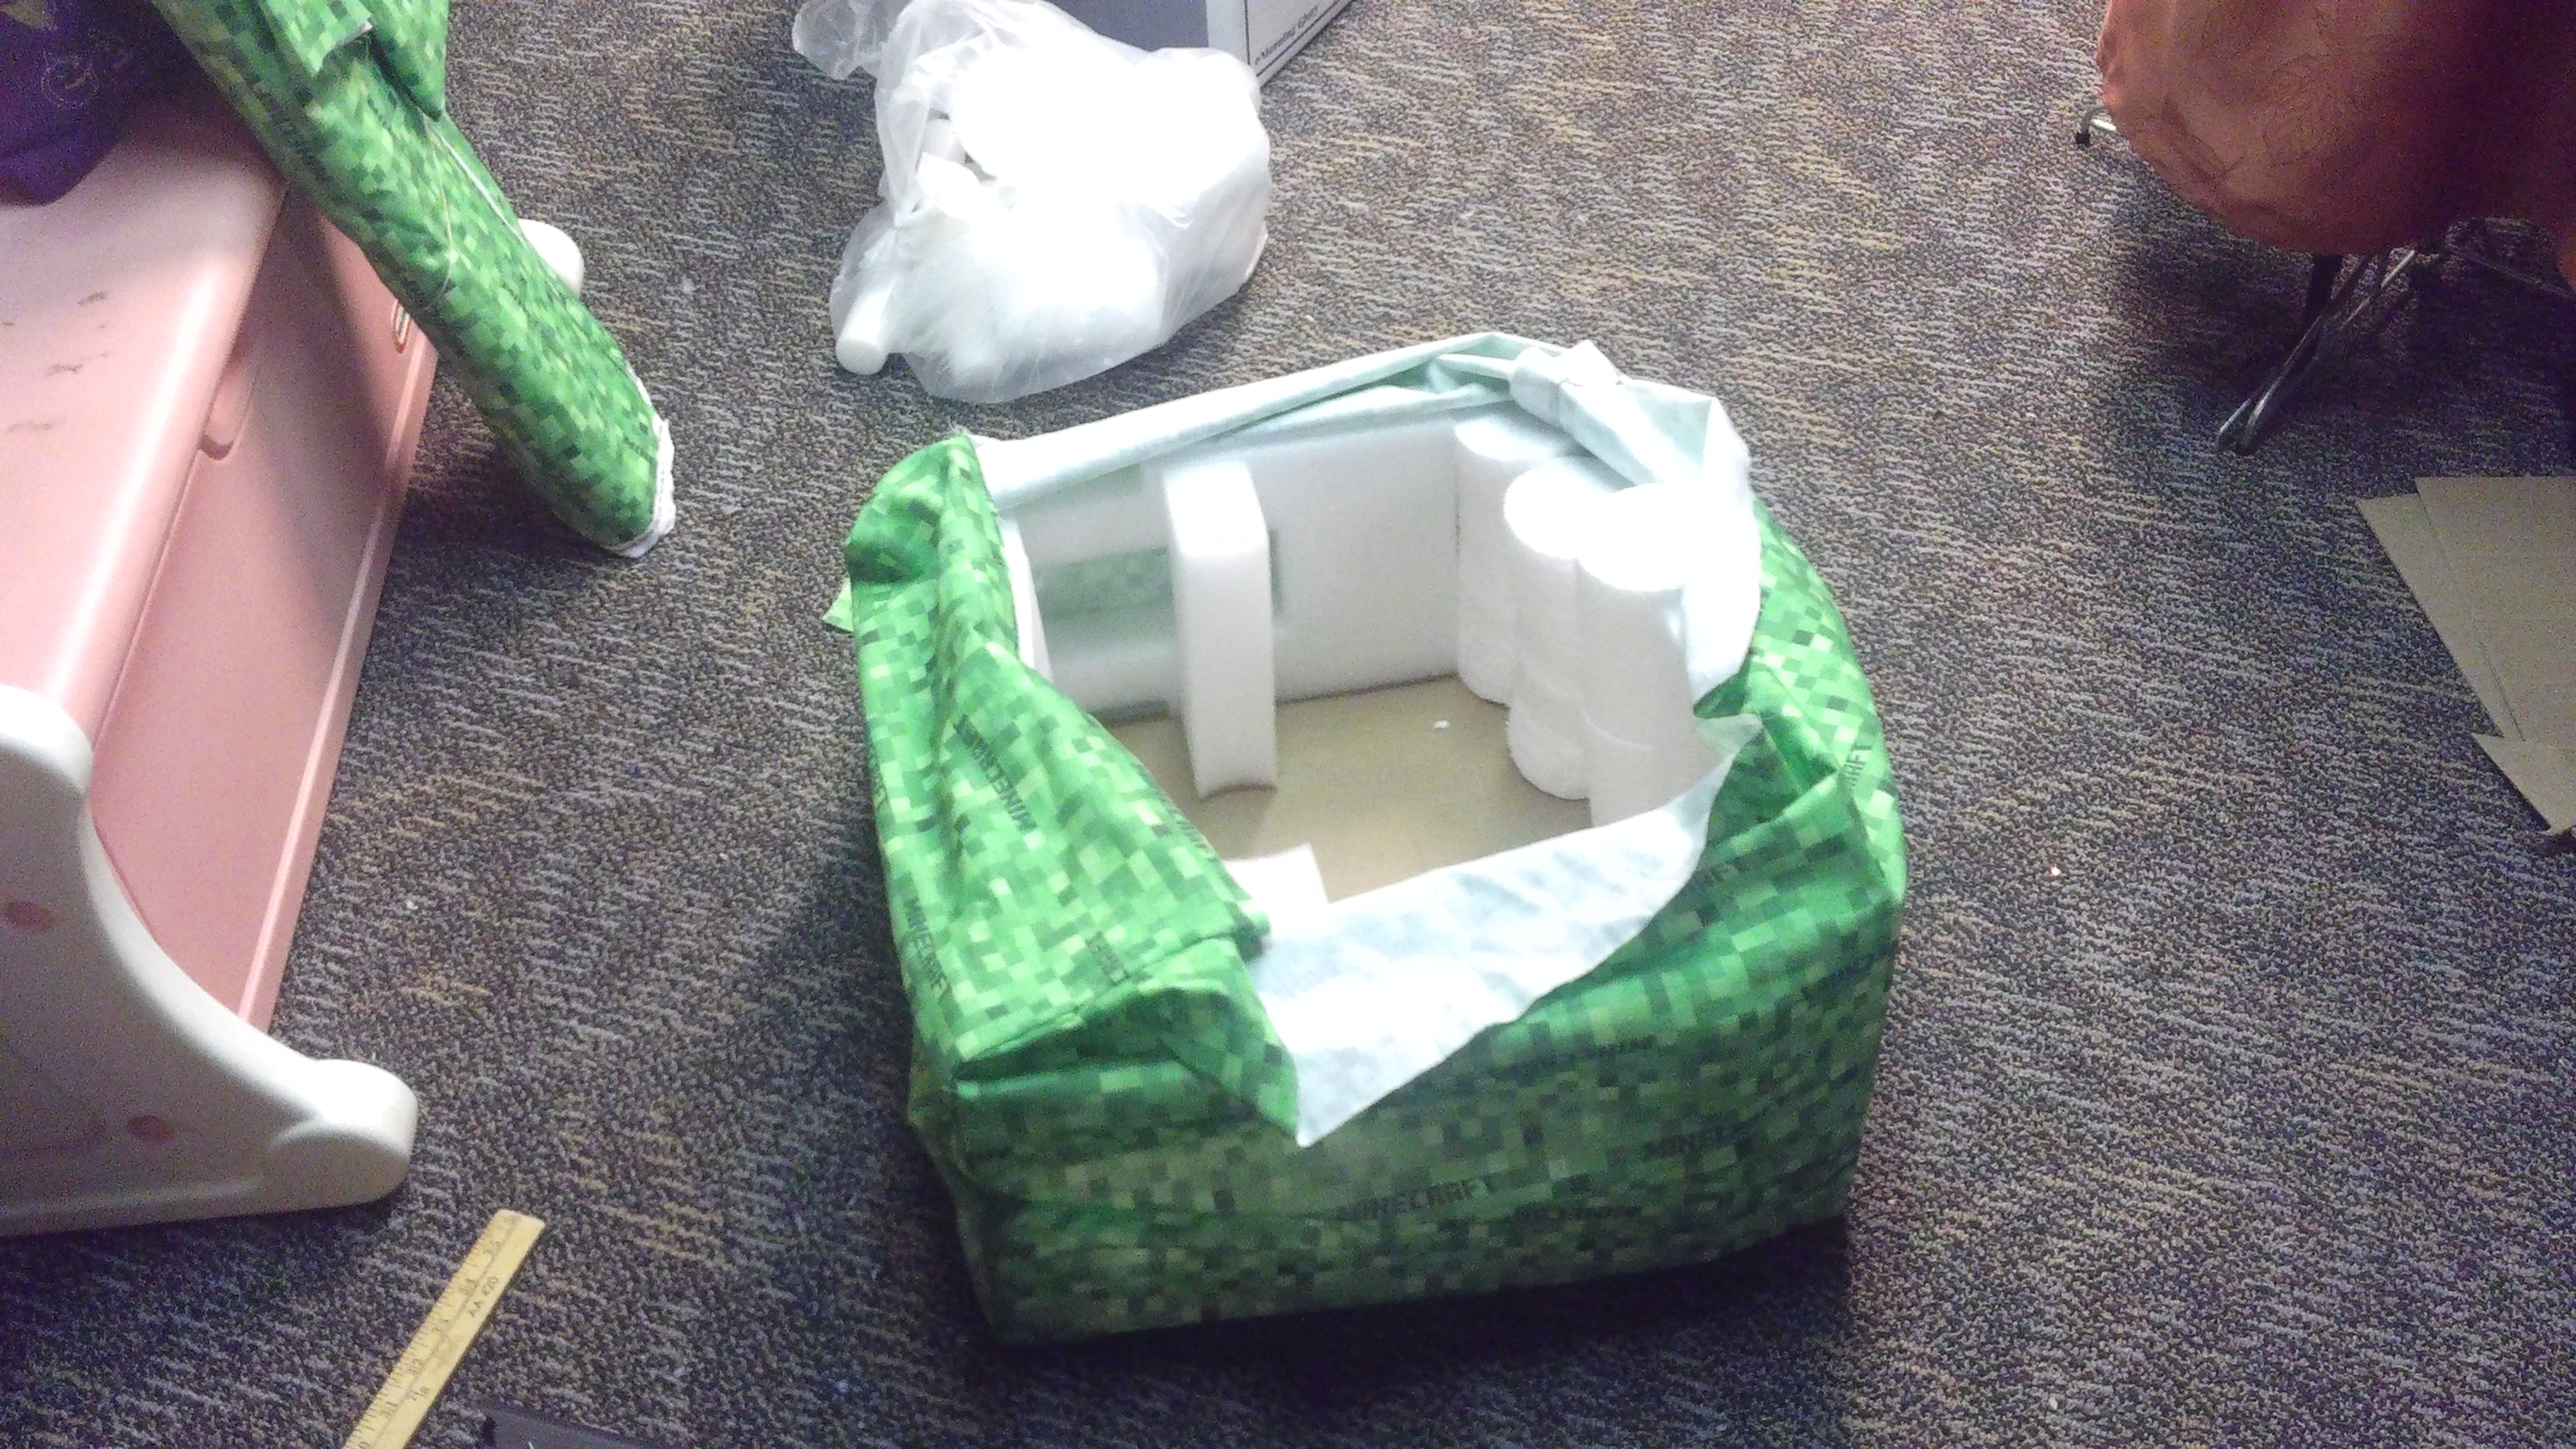
Seen previously in my Treat Yourself Haul three years ago, these two full Minecraft bolts were $14 each at Goodwill. While the blue sword print material has already been put to use as a duvet covert with matching pillowcases, these aren't the softest cotton and this green bolt actually says it's not intended for children's pajamas. What then was I to do with it? Alas, this green print is ideal for a square ottoman design befitting the game's grassy building blocks. Initially I intended this as a no-sew, all hot glue one day project. However the shorter fabric width meant I couldn't cut out three downward blocks and three sideways blocks to create a six sided square to stuff as one whole piece. Instead, two pieces were required with four panels that would be the bottom, back, top, and right side while a separate piece would be the front and left side. Thankfully, unlike my original Black and Orange Polka Dot Skirt Attempt, the direction of the Minecraft print didn't matter. Although I originally wanted to do a twenty inch square, the eighteen inch cardboard piece I used to measure, trace, and base my block panels turned out to be plenty big enough! Maybe even too big – if one's office wasn't already a slightly comical area of video games, collectibles, and Minecraft Curtains.


After cutting my shapes, I realized that if my sewing machine cooperated – unlike with the Cheap Elsa Costume – sewing these straight lines would be a lot faster then folding all the seams and hot gluing them slow and pretty. Fortunately, these quality materials went smoothly with no tension issues, threads breaking, or jams. After turning the giant square right side out, it was time to put in the simple cardboard base and stuff this mother! I used the last of the leftover recycled denim packaging I saved layered with more random Styrofoam and plastic bags. Sometimes trash comes in handy! My mother had also previously given me foam blocks from before she retired as a manager at TJX. These were actually boot packing supports that she thought I might like to use as more Candy Cane Christmas Candles, teehee. While I was in this stitch and stuff phase, I also used two odd rectangle panels from my two piece cut out and put them together to make a matching pillow, because why not? The world is harsh, we need more pillows – especially cute ones that work out unlike my Wonky Halloween Pillows.


After pinning the top, this giant ottoman was easy to hand sew closed just like a pillow. I refer to the top, but this fun block can really be tossed and turned in any direction. The soft lines and comfortable filling make for a fine place to sit or put up your feet as intended. The cats have already given it their seal of approval, and that seemingly too large size means there is enough room to put up your feet and have a cat sit on it, too – if they let that happen, that is! It does bug me, however, that thanks to the two wrapped panel corners, this isn't a perfect looking square as per the game. Had I sewn all six panels individually and maybe lined each of those seams with a thin cardboard strip, this might have been a more rigid design. If this was a formal living room piece, I probably would have gone all out with the curved upholstery needle, wood supports, piping, and fancy trims. Fortunately, that's not necessary for this fun under the desk comfort. Besides, I don't have to live with this project – my Husband does, hehe.  😁


Follow Kbatz Krafts on Facebook and Instagram for more project photos or join us on Blue Sky! Browse the Kbatz Krafts Archive for more sewing and crafting adventures including:


The Orange Tablecloth Skirt

How to Make Stuffed Pumpkins

CardboardHalloween Banner

Memento Mori Sewing