Showing posts with label painting. Show all posts

Monday, January 12, 2026

Christmas Princess Upgrades


One expects changes as a child grows, which is why I don't usually go all out with the perfect finishes for my niece's Pastel Play Dresses. Such growth, however, is also an opportunity to upgrade our Christmas Princess with some ruffles, alterations, and new bling.


Having my first bout with Covid meant all my grandiose Fall sewing plans fell to the wayside, but these simple holiday embellishments have helped me get back into the crafting swing. Since its shape as a short caplet will not change, I starting by adding a gold fringe from a closing Joann Haul to the cape hem with a running back stitch using invisible thread. I knew I needed golden flair for my niece and shopped the Joann's clearance accordingly for some matching yellow threads handy now after pressing and pinning a cheap Wal-Mart gold satin as a shiny new cape lining. Unfortunately, I did struggle with tacking in this add-in lining numerous times. Like my long gestating brown housecoat set that I intended to have done before Covid struck, making sure the lining draped correctly with the cape took several adjustments both laying it flat and leaving it on the dress form before I was satisfied with several lining pleats in the back of the cape. Though I kept trying to convince myself it didn't have to be perfect, I also want this shiny fun to last for more holidays to come.


Next, a ritzy red fabric found at my local Goodwill this summer became a new foot long hem ruffle to lengthen the original Butterick B4319 tunic. They call me “The Woman in Black” there, and the store clerk asked me if it was a cape. I said I didn't think so but it was sparkly and that was what my niece said she wanted. I do have more of the original thrift Halloween capes from which I made the dress, but I'm saving that material for when I need to expand it with a new back panel or side gores. This ruffle took about half the glittery red; it's already cut width was just under doubling the hem length for the prerequisite gathering flounce. I did this new attachment by hand, for I didn't trust this slinky sheer metallic fabric to go through my sewing machine. Likewise, I initially stitched dollar store gold ribbon – the same as the silver trim used in the Cheap Frozen Costume – with my invisible thread at the original hem to further unite the two-tone reds. However, the invisible thread proved far too cumbersome by getting caught on the ribbon's metallic prongs so I went back to a yellow thread instead. I didn't double or line this deadstock mystery material for the ruffle, but did fold it over for shine on both sides upon expanding the dress sleeve with a fun little rectangular tippet. It was easy to open the gathering at the bicep and let the new tail drape, again with a gold Joann's trim setting off the new seam.


Like my Halloween Mystery Costume was meant to look like the personification of Halloween accumulated over time with its patchwork, this costume will indeed become piece by piece anew each Christmas. Obviously at some point it will no longer perfectly match, but the secret is making sure at least two items at a time coordinate. Here the red ruffle and the sleeve tippet go together. Next year I can stripe the top sleeve puff with more gold satin or do a matching full length sleeve – or gasp, add my niece's new favorite color: pink! Here the remaining gold sleeve trim was used for the drawstring of a little reticule purse. I could stripe this poof by stitching an alternating piece of the glittery red with the yellow satin, however these materials are both delicate and of different weights so that could look too wonky. Instead I simply laid the red strips horizontal on the yellow rectangle along with the last of the gold metallic hem trim and top stitched everything in place with a running back stitch. This turned out to be not exactly straight or symmetrical, but the top drawstring channel and the gathered closed bottom hide the imperfections. Yes, I could have been far more meticulous, but for a once a year use project like this, what would precision matter? This came together in a few hours, and the toughest part was trying to finagle the last of the gold fringe as some sort of tassel on the bottom that I ultimately left off to save for another future doodad.


Hot glue and clearance Wal-Mart yellow tulle made for an instant veil under the back poinsettias and bells of the existing Christmas wreath head roll in another simple yet oh so dramatic upgrade. I could have made a truncated hennin to go inside the roundlet, but my niece loves to precariously swing around my fifty cent pimp cane turned gnarly forest staff every chance she gets! Originally made for my Halloween Mystery Costume, this staff does double duty with my Mother Christmas Costume, so I decided to make my niece her own mini forest scepter more to her scale. A dollar store Halloween battery candle and empty tin foil roll combined with some backing cardboard, egg carton, and masking tape became the most magical yet cheapest make possible. Like my staff, stiffening hot glue creates that enchanted wood design as well as securing the egg carton strips around the faux candle flame like a mystical splintering effect. A black acrylic base coat and brown highlights finalized the branch motifs, and unlike my staff, this weekend project actually glows! I spoke to my niece on the phone during this multi step upgrade, telling her I was working on redoing her Christmas costume. “Thank you,” she said in her little five year old voice. I kept hearing this in my head thereafter, her appreciation spurring me on despite my lagging and any little imperfections or fudges and fixes along the way.


For Santa Lucia Day after saying, “Hi Kristin. Why are you dressed like that?” and “Who's Mother Christmas?” My niece grabbed her staff and said, “One of my own!” She kept running back and forth swishing the skirt and sleeves and refused to take her off dress for dinner. We had to compromised by letting her wear the cape at the table but she didn't want to share her scepter with her grandpop. My mother who taught me to sew (you can read my Legacy of Sewing article in the #FamilyTime issue of Search Magazine available now) was impressed with what looked like such a deceptively elaborate costume. The ruffle was actually a little long and the tie in the back was still loose enough for more room to grow. Had I gone straight through this project, it would have been done in a week but instead real world interference meant it took a month. However seeing her joy upon donning the costume, handing out the picture prints for others from inside her reticule, and waving her scepter about...this is why we do it amirite?


Follow the Kbatz Krafts Facebook for more photos or join us on Blue Sky for the latest craft adventures! Visit the Kbatz Krafts Archive for more projects including: 


Saturday, November 30, 2024

Black and Orange Polka Dots 2.0 ๐ŸŸ ⚫๐ŸŸ 


When I saw this $6 roll of black and white fabric at Goodwill this summer, I knew it would be perfect for my ongoing quest in all things black and orange polka dot. Yes, orange!


Unlike my first problematic attempt at a black and orange polka dot skirt, there was enough yardage here to use the full pattern seen in my 5 Skirts, 1 Pattern video. This has become my go to reliable skirt shape, and I didn't have to fudge any cuttings that led to mistaken pattern pieces like last time. Obviously however, these dots are white, not orange. I ordered a box of orange Sharpies to color each dot, and yes this certainly took some time spread out over several weekends so my wrists wouldn't hurt. This also took several of the orange Sharpies to do the full skirt fabric and waistband, and I varied the areas as I went so if there was any marker differentiation, it was at least spread across the skirt. I didn't need one entire section to look entirely different like my previously botched skirt! The actual hemming, seams, and pressing all went smoothly. Once you're familiar with a pattern, a large skirt like this can actually be done in less than a week. This was a forgiving lightweight knit that does need a petticoat or underskirt. However, I choose not to line it as that would have been a lot more material better served in another project.


Although the stretchable material meant I could fudge the inside of the waistband, the entire skirt is actually surprisingly heavy and quite warm. That heaviness meant I had to add in some more thrift grab bag binding to reinforce the waistband. After losing weight due to health issues in 2023 (which also stalled much of my DIY projects), I had to reduce my standard waistband measurement plus move over the buttonhole. However, it's still a little large and with the fabric weight hangs down slightly on my hips. This isn't a major problem, but in the future I must learn to better style my blouses or belts with this skirt. This looks great with a corset in medieval fashion as the pattern originally intends! Unfortunately, I'm also aware that perhaps I shouldn't dress in all black, witchy, everyday is Halloween, stand out unusual clothing thanks to the incoming political climate. This skirt has been done for several months, yet it's taken me this long to do this little report. Since the election it's been difficult to write much of anything despite outlet deadlines, much less complete unfinished sewing projects. Hopefully now my intended holiday tasks will spur me to get things done!


Ironically, when I wore this skirt for daylight Halloween adventures, the dots didn't look that orange – meaning this is actually quite a neutral piece. Initially I was unsure of the yardage so I went against making a dress. Separates seemed to make more sense in what could have been an overwhelming pattern, and now I definitely intend to make a matching blouse with the remaining material. Of course, my husband asked what would happen to this fabric once washed, and I expect the orange may require touch ups eventually. He also asked why I didn't just buy black and orange polka dot fabric, but the only such fabric I saw was cotton squares during a brief excursion to Wal-Mart. Despite larger, vivid orange dots, it didn't feel like quality material for the price. I was not willing to short change another attempt with cheap finagling. Since I finally have a twirly black and orange polka dot skirt, now I can also revitalize that first mistaken skirt into a cheeky apron!


You can see more photos on my Kbatz Krafts Instagram and Facebook or follow more sewing adventures:


Mother Christmas Costume

Mending with Black Lace

Another Halloween Dress

How to Make Stuffed Pumpkins


Thursday, October 3, 2024

Continental DIY at Search Magazine (and MOAR!)


It's not too late to get your copy of the #GoingGlobal Issue of Search Magazine featuring my DIY Vintage Trunk How-To! Be sure to stay tuned for upcoming issues with more of my quarterly articles at @SearchMagSF.


Simply put, I haven't done as many DIY crafts and lengthy sewing video series because I've had so many other deadlines this year thanks to writing work, podcasts, and several guest appearances. It keeps me busy and away from projects, but I'm grateful for the opportunities I continue to have. If you're an outlet or website looking for written and audio or visual collaboration, my 2025 is already getting full! Here's a short bio detailing my expertise:


Kristin Battestella writes articles, editorials, and reviews for several websites, magazines, and print publications including I Think, Therefore I Review, Search Magazine, and Keith Loves Movies. Previously a traditionally published author of speculative fiction and the Fate and Fangs vampire novels, Kristin's DIY Halloween how-tos and Kbatz Krafts articles have been featured at HorrorAddicts.net and in two Horror Addicts Guide to Life anthologies. In addition to sewing and @KbatzReviews Youtube vlogs; Kristin can be heard on the Women InSession podcast at InSessionFilm.com alongside her written classic film discourse. For Kristin's latest happenings, follow twitter.com/vampfamwriter.


There's more to come, but in case you missed everything at I Think, Therefore I Reviews, here's a quick rundown of my guest Podcast and Video Appearances in 2024:


The Jay Days YouTube Channel – Jack Irish, Bound, The Convert

Bubba Wheat's Podcast – Bedtime Stories

Making Tarantino Podcast – House of Dark Shadows


For more trash to treasure crafting adventures, visit Kbatz Krafts on Instagram or for step by step progress photos of our DIY Vintage Trunk, follow our Kbatz Krafts Facebook!


Peruse our Kbatz Krafts Archive for more upcycle projects including:


Autumn Chandelier

Cardboard Halloween Banner

Halloween Shoe Wreath

Re-Purposed Black Topiaries


Tuesday, April 9, 2024

Search Magazine Action!


Spring means it's time for the #YesItsArt Issue of Search Magazine once again featuring a DIY anyone can do from Yours Truly!


Of course, publication schedules are often months in advance, and being the black Halloween heart that I am, this is a luxury looking Autumn Chandelier upcycle done in the fall for this Spring Issue. Yes, I appreciate the irony.


Could I have left the thrifted greenery and golden fixture as is? Of course.

Would that match anything in my spooky house? Nope!


I've done several DIY projects featured in Search Magazine now with more to come, and it's been quite a fulfilling privilege to seek out a budget craft and see the project become a reality to readers. Word limits and picture space mean that I don't always mention the minutia or reasons why I do a DIY or show the problems along the way, but it's exciting to share the concept beyond the magazine on social media. I like to pass along the idea and inspiration! Anything is possible with the right craft eye once you see an object not as what it is but what it could be.


For More upcycling and trash to treasures, visit Kbatz Krafts on Instagram or for step by step progress photos of the Autumn Chandelier follow our Kbatz Krafts Facebook!


Visit our Kbatz Krafts Archive for more floral crafts including:


Upcycled Fall Florals

Mini Pumpkin Garland

Gothic Litter Box Plant Disguise

Love is Love Skeleton Wreath


Monday, January 15, 2024

Holiday Handprints!


Though inspired by readily available hand casting kits, I'm too cheap and ill-versed in such a medium to make a grandiose attempt at that kind of keepsake. Instead, I resorted to the simplest way to make some holiday child mementos: cardboard and paint.


The idea is quaint and sound – Christmas ornaments with my three year old great niece's hand print on them, four for each female relative. I always keep a few pieces of cardboard on hand (which became quite savvy to soak up after a water heater leak!) and cut a strip into squares. Using a glue stick it was easy to smoothly apply a holiday print fabric found in a Goodwill grab bag to the front side of the cardboard. The back I left clear for my niece's name and the date, because of course. Fortunately, there was just enough of this white and green wreath print to fit the three squares and one larger rectangle intended as an oversize, gift tag style ornament. Next came the hole punch for a rustic tie at the top, but some of these went through cleanly and others did not, leaving some corners delicate or in need of touch ups because I turned the squares to be upright, diamond style. Another shape like a heart or not exactly punching holes on the diamond point might have been better placement, but it was too late to turn back now! I knotted the twine securely before tying on several dollar store bells each. I thought about sprigs of greenery or festive florals, however that seemed a top heavy distraction when the forthcoming hand print was to be the focus. Instead, pipe cleaner curls in holiday red and green and recycled ribbon saved from other gift baskets became hot glued bows.


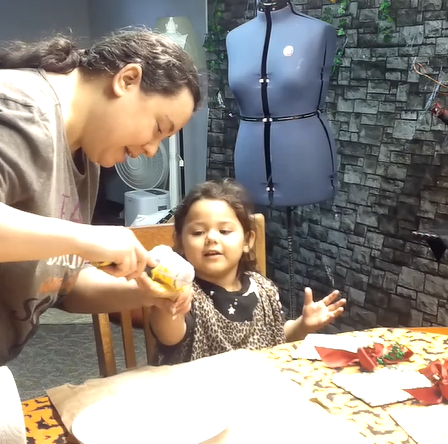
With the prep and decoration done, now it was time for the hand prints, with yellow as our chosen paint because it is my niece's current favorite color. (In these snapshots, you'll notice she is wearing my paint smock – a retired nightgown that I cut apart to draft its pattern before sewing it back together. Have I edited the six months worth of vlogs where I turned said pattern into a wearable nightgown mock up, satin nightgown, brown dress, and housecoat? No.) Trying to keep things from being too messy with a three year old, I poured the acrylic onto a paper plate and used a small roller on her hand, testing a few prints on some recycled packing paper scraps – which of course I saved and stuck on my corkboard as my holiday hand print! It took a few tries to make sure there was enough coverage and not a lot of globs between fingers, but then there was nothing to do but slap her little hand on the fabric and give it a moment press. I am so very tempted to try and do this with the pets, but with my temperamental cats I know better!


The oversize tag where I wrote the to and from for the jumbo present that my niece also wrapped unfortunately isn't my favorite. Purple was the only marker that showed on the fabric, and though it compliments the yellow, it looks too fuzzy to me. In hindsight, a darker fabric may not show through the cardboard so much and might have really let the subsequent yellow paint and any print pop. The cardboard for these ornaments will probably bend, and I wouldn't put them near hot holiday lights. Certainly, the found materials are cheap, but the captured moment is priceless. None of the receiving family members were worried about finite crafting, especially thanks to my exceptional wrapping and ribbon curled gifts presented by said niece. She drove in her Pumpkin Car, played with her Cardboard Castle – wondering why it didn't have a door? – and tried on some of the costumes in the Victorian Guest Room's costume closet. She said they were too big and I gave her an old Simplicity pattern catalog to mark all the costumes she wanted to make. I guess I need to get cracking now!


Granted this holiday write up is belated. I had originally intended to do this for Mother's Day 2023 just before the turbulence of the year really hit when one of the mothers who previous received my Memento Mori Sewing and deserved a hand print of her own unfortunately passed. As my own health declined, August birthdays also came and went so instead these hand prints became my only handmade gift for Christmas. It's nothing new, but fortunately, this one day, free, timeless idea can be for any occasion – birthdays, valentines, an egg print for Easter or leaves in the fall.


For more photos, follow Kbatz Krafts on Instagram or Facebook or visit our Archive for more including:


Cardboard Halloween Banner

Mother Christmas Costume

Autumn Riding Habit


Friday, January 6, 2023

It's a Cardboard Castle!


What do you do when you have a lot of big boxes but make a Cardboard Castle of course! I hadn't thought to do this for the family toddlers until I saw it on Pinterest, and I was hesitant because it seems...tacky? That wasn't going to stop me, however, and inspiration struck thanks to cottagecore painting and castle facades.


After a day of temporarily taping, assembling, cutting out windows, and configuring the roof; it took another day to hot glue all the seams. I added a cardboard floor for a sturdy base, and corners were reinforced with those extra cardboard corners shrewdly saved from other shipping. It's all surprisingly solid! Finishing the seams with masking tape and painting those joints brown while the rest of the walls were done in a white wash paint created a fun, medieval-esque interior. The paint job didn't have to be perfect and I could have gone into much more ye olde detail, but why go for broke on a recycled, temporary project that a child will ultimately out grow? The floor and roof lines were also painted brown to complete the look, embracing the bones of the building for what it's worth!


For the exterior I turned to the dollar store castle stone Halloween scene setter seen in my Using Halloween Scene Setters Everyday craft. (It's still hanging in my basement!) Wrapping the plastic around was just like a big Christmas present. The stone pattern is fairly forgiving so long as you pay attention to the roof angles and folded corners. I was probably unnecessarily fussy in making sure my clear tape lines were as taut as possible, but using tape instead of glue meant I can salvage the scene setter once the play castle has had it's day. Overall, this took about three and a half days between other holiday projects – an easy family to-do thanks to found materials and paints.


Older kids might enjoy decorating something like this themselves, and I may put a rug and a pillow inside to create a future reading nook. It all seems preposterous and short lived, yet the possibilities are endless!


For more progress photos, follow Kbatz Krafts on Facebook and Instagram


More Recycled Kbatz Krafts:

Cardboard Stained Glass Window

Cardboard Coffin

DIY Gothic Lantern

Pumpkin Car Makeover


Monday, October 31, 2022

On Unicorns and Autumn Habits ๐Ÿ‚๐Ÿฆ„๐Ÿ‚


After making my Jaunty Autumn Hat, I wasn't sure what to call this ensemble. It looks like a pseudo Victorian Halloween riding habit but the equine mood is more broadly autumn. Ready for my side saddle in September and November, too! Habit, of course has frock and obsessive meanings, and I got a Fall habit bad, wouldn't you say? Thus, I set off with my Goth Parasol and the Pumpkin Car to go Trick or Treating with the family unicorn.


My niece said I looked like I took the bus from Halloween Town and my sister called me a spooky Mary Poppins thanks to my bag of tricks, and after seeing a lot of people not dressed up, I wondered if the cat on a jack-o-lantern brooch or the leaves and acorn earrings were a bit twee? I started out wearing a ruffled thrift blouse underneath my thrift blazer, but it got a bit hot under the dollar store bat scarf and the petticoat under my orange skirt was kind of heavy. I hate when a sliver of petticoat shows! Ironically, I have footage of how I made the orange skirt and the petticoat made out of Grammy's Curtains will be in service again for my current December project. I used the same methods from my Reversible Red Skirt, but that is one of my least popular videos so I never finished the videos for all the other skirts I made this summer – yet.

The Upgraded Masquerade Mask made for some peek-a-boo but it wasn't an indoor crowd so ended up not wearing my Halloween T-Shirt Mask. Updated booster, baby! The netted gloves were from a party supply store ages ago, and I have a dollar store fan for every season, but the boots are relatively recent Goodwill replacements for my previous ~Victorian kicks that earned a lot of wear and tear. And yeah, I added a sunflower and bells to my front button #dealwithit.


How old is too old to go Trick or Treating?


Visit our Facebook and Instagram for more photos or see all our Kbatz Krafts Halloween Makes on YouTube!


Photos by Jahli Creations and Hit the Stars Learning with Horses. Order holiday soaps at Jahli Creations ASAP!


Tuesday, September 27, 2022

Upcycling Fall Florals ๐Ÿ‚


After taking apart a free fake plant for the Gothic Litter Box Planter Disguise, the rest of it was looking pretty ugly. Thrift florals in the Halloween closet also seemed sad, but now's time for autumn moods and morose arrangements! Orange picks from my latest Mini Thrift Haul Video were added to the black and red roses and black leaves I usually put out for Halloween – an easy combination of fall colors in a old red vase. It's a lightweight display that would look nice on my piano, but feline curiosity would make that a problem! This ensemble looks sophisticated and ironically bright thanks to the fall coloring.


The white light up branches and cotton stems from my thrift trips, however, inspired a study in contrast. More picks, thrift leaves, and the leftovers from my free plant were to be Painted Black of course. These by hand acrylics took a little time and detail, but the free grass stems were the real pain! Dipping them directly into the black paint made them clump together, spray painting them made them all stick out too much, and you can still see a touch of green if you really look. Although I cut stray strands and the gnarly straggly matches the black and white barren contrast, it looked a little crappy! Fortunately, filling in the pot with more curly cue orange stems and dollar store moss from the supply stash helped bring the look together.


Of course, the more I stared at it, this arrangement looked too barren. I was tempted to buy more florals, but instead spray painted the remaining vine used for the Pumpkin Car Makeover. This was one stalk that had been dangling among my Cardboard Tombstones, so I separated the stems with wire cutters, varying the leaves and length before black touch ups. I stuck these vine clips to spill over the vase and fill in some faux growth behind my thrift magnolia. These cheap, found florals have now been put to use as some gothic organics and autumn art – and the cats have swatted at it already!


Fore more project photos, follow Kbatz Krafts on Facebook and Instagram


Yet More Kbatz Krafts:

How to Make Stuffed Pumpkins

Pumpkin Ottomans

Using Halloween Scene Setters Everyday

How not to Make Mystical Orbs

Cardboard Stained Glass Window

DIY Gothic Lantern

DIY Cardboard Coffin