Showing posts with label Christmas. Show all posts

Friday, January 30, 2026

The Lemon Dress


I couldn't wait to dive-in making something for my yellow loving niece upon snagging three pre-cut yards of this fun fabric labeled “Mediterranean Lemons.” They were a whopping 25 cents each clearance at Walmart! However, since I was unsure of the cotton quality or the true cut material amount, I decided to keep it simple and use the same Purple Princess Tunic Butterick B4319 pattern to sew a pleasant spring dress.


The trouble with this kind of cheaper material from a place like Walmart is that they are single yards folded on small card displays. No matter how much I steamed, pressed, and ironed; the fold lines were still apparent. I also laid out the yards end to end as one piece when considering my pattern cut 2 back and on the fold front. This is a busy pattern so I wasn't concerned with matching at the seams. However, if you do need to perfectly match materials on a larger project, this kind of cheap pre-cut material probably won't work. This is the difference between non-fabric stores such as Walmart and now the overwhelmed crafter Michael's playing wannabe Joann. They attempt to sell fabric when neither has the proper sales storage, yard cutting, or quality materials for the experienced sewer expecting more or the would-be sewing turned discouraged consumer. For kids play clothes this fabric works – but I don't know that I would have paid full price for this material knowing the Wal-Mart shortchanges. Anyway, fin rant and R.I.P Joann.


Like one of the previous purple tunics, I cut this pattern with an open back seam for an elastic waist gathering. I compared the original tunic which was too big at the time against the pattern and my own paper pattern creation of my niece's current measurements. With these three pre-cut yards, there wasn't enough material width to do an all-in-one sleeve as the original pattern calls for, and I think I initially left too much excess in the shoulder line because of this. Fortunately I could correct that once I saw where my new puffy sleeve additions had to be set. These six inch poofs were the leftover cuts from the bottom of my lemon yards, gathered with an elastic channel at the bicep and then pleated into the armscye. A delicious light teal lace from a thrift grab bag added more length and flutter to the sleeve as well as the collar, waist, and hem. I've been working thru this goofy bag of pastel laces on all my niece's creations! While the hem and collar were just the lace ruffle as is, the lace was straight stitched at the elastic waist channel before I did the gather through – giving the skirt portion an extra flouncy oomph once it was all cinched.


Inspired, I decided to use the roundish shoulder cut-out scraps for a little reticule drawstring purse as last seen in my Christmas Princess Upgrade. Although I didn't expect to use all three yards, I also want to maximize every piece of material. Unfortunately, I thought I could use the neckhole scraps to make the crown of a subsequent matching bonnet but they were too small. Instead I took a round and folded over strip from the third untouched yard for the hat top and its double sided gathered floppy brim. The teal lace again set off the little hat as well as the drawstring channel of the purse. Deep in my craft drawers I found an old teal satin ribbon roll that came in handy for the reticule tie and a bonnet strap. C'est adorable!


Strangely I went out of order on this project, doing the small hand sewn accessories before finishing the dress seams and straight machine stitching. Plans to do this earlier in December were of course delayed and it came down to the holiday wire buckling down for two days to get it all done. Somewhere I think I may have doubled the waist measurement when I didn't need to do so, as the dress looks a little too big. Fortunately – or unfortunately – there's room to grow and time to like it. For upon seeing these Mediterranean Lemons on Christmas Day, my niece promptly said, “I hate it.” 


Visit Kbatz Krafts on Facebook for more photos or follow us on Blue Sky for the latest craft adventures! Peruse the Kbatz Krafts Archive for more projects including: 


Friday, January 16, 2026

DIY Holiday Adventures


Still catching up post-Covid, I didn't get to all the DIY December ideas on my list this year. No scrap ornaments nor holiday banners like my Celestial Banner for Search Magazine! What I did do came down to the wire, and the reactions to this trio of festive projects were...mixed?


The Jewelry Treasure Chest

I saved this top opening gift basket several years ago but forgot what I had wanted to do with it – until I saw it again this year, that is! I thought the flip top made it the perfect treasure chest for my niece. She's been sorting through some of my jewelry making supplies for the beads she likes, so I made as many bracelets and necklaces as I could with her favorites, the pink bead discards I don't like, and all the odd, low quantity, fun beads that don't match anything else. Many of the bug and butterfly charms and unique bobbles came from three cases of beads I found at Goodwill earlier in the summer for $8 each. Unlike some of my seemingly elaborate Black and White Bobbles, these were all done with simple elastic cording that can grow with her or can be taken apart later if she wants to do her own creations. More plastic Mardi Gras necklaces and fake pearls removed from other cheap costumes supplemented the chest along with her play masks, tiaras, and folding fans. I also put some of the jewelry sets I made in smaller boxes or little velvet bags within the chest to make them seem even more fancy. This was seemingly the biggest hit of the holiday when my niece didn't want to open anything else on Christmas morning because she had to go through the entire chest claiming she wanted to wear twenty pieces at once. Unfortunately, she only wanted the pink and later red jewelry – refusing to consider any other color even when playing with the mask and fan. So... I guess it was worth it?


Potter Scrap Pumpkins!

I got a pair of Gryffindor pajama pants for my husband that turned out to be quite long. Upon hemming them, I saved the excess inches intending to make something, but what? Once I knew making personalized scrap ornaments for each of my family wasn't feasible this holiday season, I realized I could still at least make Stuffed Pumpkins for my older niece with these pant ends. Once upon a time she was a big Potter lover, but this print is mature and subtle enough to just be regular autumn dΓ©cor without screaming boy wizard. One end is gathered closed before the stuffing with fabric scraps and plastic bags. Rustic twine for the pumpkin sections, dollar store leaves, curly pipe cleaner vines, and a cinnamon stick stem topped off this gourdy pair. Upon seeing them on Christmas Eve, my niece first asked where I got the fabric and if they had been worn before they were pumpkins? Which I guess I could see as humorous because they hadn't been, and likewise, they weren't stuffed with dryer lint – although that is a perfectly viable stuffing option in a pinch. All gathered were very bemused and said that I was a very resourceful person. I'm not sure, however, if that resourceful was meant as a positive or just being polite, for I was also teased for saving all the holiday package shipping paper. Hey, man, it's good for painting drop cloths and scrap sewing patterns!


It's a Christmas Vacation Pillow

I get my husband a lot of character shirts at the thrift shop that he may like until they wear thin but sometimes the sizes aren't right. Usually I give away the too bigs and too smalls immediately or make pillows for the bean bag. This National Lampoon's Christmas Vacation shirt, however, I found again wrapped around loose ornaments when I opened my ornaments tote bin this year – meaning I must have intended to make it a pillow last year. Fortunately, unlike my Wonky Halloween Pillows, this was in good condition and easy to cut out the design square before running it through the machine. Again scraps and plastic bags were my stuffing – this is only a decorative pillow rather than needing to be soft and cozy. Its hockey playing Santa pillow companion was an earlier upcycled thrift find – I only have two Santas in my house and both are left shooting hockey players! There are more ready to retire shirts that I would like do as a quilt like my Memento Mori piece, but only my husband would probably get all the pop culture shirt references, for no one seemed to get, care, or notice the Christmas Vacation quote on the pillow. Oh well. Thankfully, everyone did eat all the pizzelles of course.


Visit Kbatz Krafts on Facebook for more photos or follow us on Blue Sky for the latest craft adventures! Peruse the Kbatz Krafts Archive for more projects including: 


Carving and Baking with Real Pumpkin

Mini Pumpkin Garland

Going Green Jewelry


Monday, January 12, 2026

Christmas Princess Upgrades


One expects changes as a child grows, which is why I don't usually go all out with the perfect finishes for my niece's Pastel Play Dresses. Such growth, however, is also an opportunity to upgrade our Christmas Princess with some ruffles, alterations, and new bling.


Having my first bout with Covid meant all my grandiose Fall sewing plans fell to the wayside, but these simple holiday embellishments have helped me get back into the crafting swing. Since its shape as a short caplet will not change, I starting by adding a gold fringe from a closing Joann Haul to the cape hem with a running back stitch using invisible thread. I knew I needed golden flair for my niece and shopped the Joann's clearance accordingly for some matching yellow threads handy now after pressing and pinning a cheap Wal-Mart gold satin as a shiny new cape lining. Unfortunately, I did struggle with tacking in this add-in lining numerous times. Like my long gestating brown housecoat set that I intended to have done before Covid struck, making sure the lining draped correctly with the cape took several adjustments both laying it flat and leaving it on the dress form before I was satisfied with several lining pleats in the back of the cape. Though I kept trying to convince myself it didn't have to be perfect, I also want this shiny fun to last for more holidays to come.


Next, a ritzy red fabric found at my local Goodwill this summer became a new foot long hem ruffle to lengthen the original Butterick B4319 tunic. They call me “The Woman in Black” there, and the store clerk asked me if it was a cape. I said I didn't think so but it was sparkly and that was what my niece said she wanted. I do have more of the original thrift Halloween capes from which I made the dress, but I'm saving that material for when I need to expand it with a new back panel or side gores. This ruffle took about half the glittery red; it's already cut width was just under doubling the hem length for the prerequisite gathering flounce. I did this new attachment by hand, for I didn't trust this slinky sheer metallic fabric to go through my sewing machine. Likewise, I initially stitched dollar store gold ribbon – the same as the silver trim used in the Cheap Frozen Costume – with my invisible thread at the original hem to further unite the two-tone reds. However, the invisible thread proved far too cumbersome by getting caught on the ribbon's metallic prongs so I went back to a yellow thread instead. I didn't double or line this deadstock mystery material for the ruffle, but did fold it over for shine on both sides upon expanding the dress sleeve with a fun little rectangular tippet. It was easy to open the gathering at the bicep and let the new tail drape, again with a gold Joann's trim setting off the new seam.


Like my Halloween Mystery Costume was meant to look like the personification of Halloween accumulated over time with its patchwork, this costume will indeed become piece by piece anew each Christmas. Obviously at some point it will no longer perfectly match, but the secret is making sure at least two items at a time coordinate. Here the red ruffle and the sleeve tippet go together. Next year I can stripe the top sleeve puff with more gold satin or do a matching full length sleeve – or gasp, add my niece's new favorite color: pink! Here the remaining gold sleeve trim was used for the drawstring of a little reticule purse. I could stripe this poof by stitching an alternating piece of the glittery red with the yellow satin, however these materials are both delicate and of different weights so that could look too wonky. Instead I simply laid the red strips horizontal on the yellow rectangle along with the last of the gold metallic hem trim and top stitched everything in place with a running back stitch. This turned out to be not exactly straight or symmetrical, but the top drawstring channel and the gathered closed bottom hide the imperfections. Yes, I could have been far more meticulous, but for a once a year use project like this, what would precision matter? This came together in a few hours, and the toughest part was trying to finagle the last of the gold fringe as some sort of tassel on the bottom that I ultimately left off to save for another future doodad.


Hot glue and clearance Wal-Mart yellow tulle made for an instant veil under the back poinsettias and bells of the existing Christmas wreath head roll in another simple yet oh so dramatic upgrade. I could have made a truncated hennin to go inside the roundlet, but my niece loves to precariously swing around my fifty cent pimp cane turned gnarly forest staff every chance she gets! Originally made for my Halloween Mystery Costume, this staff does double duty with my Mother Christmas Costume, so I decided to make my niece her own mini forest scepter more to her scale. A dollar store Halloween battery candle and empty tin foil roll combined with some backing cardboard, egg carton, and masking tape became the most magical yet cheapest make possible. Like my staff, stiffening hot glue creates that enchanted wood design as well as securing the egg carton strips around the faux candle flame like a mystical splintering effect. A black acrylic base coat and brown highlights finalized the branch motifs, and unlike my staff, this weekend project actually glows! I spoke to my niece on the phone during this multi step upgrade, telling her I was working on redoing her Christmas costume. “Thank you,” she said in her little five year old voice. I kept hearing this in my head thereafter, her appreciation spurring me on despite my lagging and any little imperfections or fudges and fixes along the way.


For Santa Lucia Day after saying, “Hi Kristin. Why are you dressed like that?” and “Who's Mother Christmas?” My niece grabbed her staff and said, “One of my own!” She kept running back and forth swishing the skirt and sleeves and refused to take her off dress for dinner. We had to compromised by letting her wear the cape at the table but she didn't want to share her scepter with her grandpop. My mother who taught me to sew (you can read my Legacy of Sewing article in the #FamilyTime issue of Search Magazine available now) was impressed with what looked like such a deceptively elaborate costume. The ruffle was actually a little long and the tie in the back was still loose enough for more room to grow. Had I gone straight through this project, it would have been done in a week but instead real world interference meant it took a month. However seeing her joy upon donning the costume, handing out the picture prints for others from inside her reticule, and waving her scepter about...this is why we do it amirite?


Follow the Kbatz Krafts Facebook for more photos or join us on Blue Sky for the latest craft adventures! Visit the Kbatz Krafts Archive for more projects including: 


Monday, July 14, 2025

Green Velvet in July?


I've been endeavoring to both sew items I need as well as whittle down the unfinished to do pile encroaching upon my work table. Sometimes my project reasons are practical. Working on a green velvet skirt in July just because the green thread was still in my machine after making the Minecraft Ottoman...we'll call this a whim.


This leftover intention from my Mother Christmas Costume has been waiting on my table since 2022, and my notion to make as many skirts as able as seen in my 5 Skirts, 1 Pattern Video persists. Here the center panel and the two back pieces from the Butterick 6196 source remained to size while each side panel was folded and reduced to fit the remaining green curtain fabric. Although the front is its own panel, I cut the back and side pieces as one continuous back. This isn't the most super quality material and it doesn't fray, however I wanted as much fullness with as little seams as possible. While the skirt was laid out flat on the floor, it was easier to pin the hem with several turn under folds before bee-lining every thing through my machine. I surprised even myself when this entire cutting and sewing process only took several hours! If your machine cooperates on decent material with a pattern you know, sewing can be pretty quick and easy, who knew?


After stay stitching the top line, I pinned and pleated the skirt to size on my dress form. Cutting a short back line created a place for my opening skirt placket, but these pleats and folds did become a little too thick for the machine. Fortunately, the original six tab top curtain pieces came in handy as the waistband! After seam ripping them all open, I sewed them all together as one continuous length – retaining their folded seam lines for the waistband and adding a double strip of thrifted black bias tape for reinforcement. The waistband was pinned and basted before a tight running back stitch in front and a final inside stitch encasing the skirt waistband. Black on black sewing I expect to be tough, but the worst part here was the dark green on dark green tiny stitches making my eyes go wonky! I turned to my Giant Button Jar for a unique green button before a finishing press. Initially, I was tempted to do a black velvet trim from my recent Joann Haul but thought it might be too heavy. However a day later I decided to turn up the hem again with some supporting tape and do a wider black velvet panache with some Dollar Store Halloween ribbon. I like the idea that my boots would show underneath with a coordinating black sweater and belt – even though it will probably be a mild 60F in December when I eventually wear this!


It's actually quite tempting to add even more rows of trim, maybe even some black fringe to match the green velvet dramatics! Of course, I intend to do a matching vest with the last remaining material, too, and those future trims should also coordinate with the skirt. Then again, I am but one person doing one impulse project at a time and I have more seasonal summer tops to make. Although this wasn't my next intended project, this unique, feel good look from thrifted curtains is a simple can do that inspires me to continue on those more immediate wardrobe needs. With no second guessing, mistakes, or re-dos thanks to previous pattern use and sewing know how, it's pretty amazing what wearable in a day can be accomplished. So what if it's holiday green in July?


For more project photos, visit Kbatz Krafts on Facebook or Instagram and join us on Blue Sky. Read about further sewing shenanigans in our Kbatz Krafts Archive including:


The Orange Tablecloth Skirt

Black and Orange Polka Dot Skirt 2.0

Reversible Red Skirt

Another Halloween Dress


Monday, January 6, 2025

A Christmas Princess!


Emboldened by my sewing experiments in Pastels, I decided to make a Christmas frock for my four year old niece. Sensibly, just after Thanksgiving, as a surprise presented on December 12 for Santa Lucia Day – while wearing my Mother Christmas, of course. No pressure!


Previously in making that
Mother Christmas Costume, I had cut off the fake fur from two red Halloween costume capes found at Goodwill. Now I again used the Butterick B4319 tunic pattern traced and cut from the bottom half of one cape. This left the upper portion as a new short cape, so I stitched a drawstring channel at the top and added the original fur scraps back around the collar using cumbersome but worthwhile invisible thread. The red tunic was also slightly more time consuming than the inspiring purple mock-ups thanks to using the invisible thread on the golden waist tie – ribbon left over from my Drab to Glam Lampshades with no inch to spare. This material is velvet costume cheap, too, unlined with unfinished seams. However I wanted any seen exterior thread to look somewhat nicer than the devil may care stitches on the play pretend purple frocks. Unfortunately I don't have many gold or yellow materials and notions. Lining the cape with a contrasting golden satin would have been so regal but I didn't have any!


Yellow is currently my niece's favorite color – as well as gold because as she says, “It's yellow, but better.” – and the embellished collar piece was actually a fabric Halloween crown I found clearance at Target for $1.50. Again the invisible thread was critical but by hand delicate to make sure it was secure. The back of the neckline has several pleats like the original purple mock-up adjusted for her size, but the short sleeves were gathered to be puffy for a vaguely historical silhouette. I thought of making a long sleeve with contrasting, epic medieval flair, but that can be an upgrade next year – maybe when I find some gold fabric! For me the piece de resistance was actually the impromptu head roll made with a found foam piece from my cardboard stash, leftover gold scraps from when I made a red and gold dress for my niece's mother twenty years ago, and the last of the reclaimed white fur. Dollar Store gold tubing and sparkle branches from previous projects and some random poinsettia florals with bells made for a festive hot glue finish.


When Mother Christmas finally visited this year (in my costume that is now so big the waist cincher barely held it in place but did I fix it knowing it had gotten too big last year? No.) my niece said she couldn't wear this Christmas dress because it wasn't Christmas yet. I convinced her to try it on in case I needed to fix it and then she was happy to give everyone magical holiday hugs before reading her Christmas storybook. On one hand, the costume is a little big even with the waist tie tightened in the back, which means she has room to grow into it by next Christmas when she might be interested in helping do further adjustments or more accessories and those sleeve embellishments. However, I was surprised that the dress was actually several inches short, with my niece already having grown in the few months between the earlier pretend dresses. Again, rather than cutting into the second red cape for lengthening ruffles now, I will save that until next year when I'll really need it! For a week's worth of work of holiday makes, my niece initially wore the merry ensemble for perhaps ten minutes. It also took me longer to get into my costume than for the time I actually wore it, but her hugs and smiles were worth it.


Having a holiday deadline on projects for others helped me creatively focus, but like the rest of my writing work in the past few months, these subsequent DIY articles have been slow coming. Who wants to read of silly sewing escapades in the 2025 we're facing? Come Christmas at my house, however, my niece was skipping around in her dress and cape, refusing to let go of the banana in her hand to take off the costume and go home. Maybe a basic tunic is tough to some, but anyone can make a wintry cape or holiday head roll. Such whimsy borne of the cheapest, leftover, found materials! I hope maybe we inspire you to find your own little enchanting, imaginative solstice – and to eat more bananas! You need your potassium.


Visit Kbatz Krafts on Instagram and Facebook for more project photos, crafts, and sewing adventures including:


Black and Orange Polka Dots 2.0

Holiday Handprints

Pumpkin Car Makeover

Reversible Red Skirt


Monday, January 15, 2024

Holiday Handprints!


Though inspired by readily available hand casting kits, I'm too cheap and ill-versed in such a medium to make a grandiose attempt at that kind of keepsake. Instead, I resorted to the simplest way to make some holiday child mementos: cardboard and paint.


The idea is quaint and sound – Christmas ornaments with my three year old great niece's hand print on them, four for each female relative. I always keep a few pieces of cardboard on hand (which became quite savvy to soak up after a water heater leak!) and cut a strip into squares. Using a glue stick it was easy to smoothly apply a holiday print fabric found in a Goodwill grab bag to the front side of the cardboard. The back I left clear for my niece's name and the date, because of course. Fortunately, there was just enough of this white and green wreath print to fit the three squares and one larger rectangle intended as an oversize, gift tag style ornament. Next came the hole punch for a rustic tie at the top, but some of these went through cleanly and others did not, leaving some corners delicate or in need of touch ups because I turned the squares to be upright, diamond style. Another shape like a heart or not exactly punching holes on the diamond point might have been better placement, but it was too late to turn back now! I knotted the twine securely before tying on several dollar store bells each. I thought about sprigs of greenery or festive florals, however that seemed a top heavy distraction when the forthcoming hand print was to be the focus. Instead, pipe cleaner curls in holiday red and green and recycled ribbon saved from other gift baskets became hot glued bows.


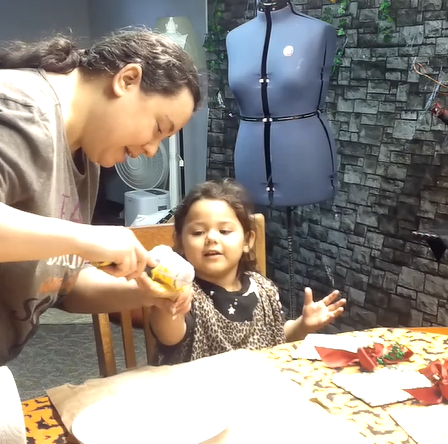
With the prep and decoration done, now it was time for the hand prints, with yellow as our chosen paint because it is my niece's current favorite color. (In these snapshots, you'll notice she is wearing my paint smock – a retired nightgown that I cut apart to draft its pattern before sewing it back together. Have I edited the six months worth of vlogs where I turned said pattern into a wearable nightgown mock up, satin nightgown, brown dress, and housecoat? No.) Trying to keep things from being too messy with a three year old, I poured the acrylic onto a paper plate and used a small roller on her hand, testing a few prints on some recycled packing paper scraps – which of course I saved and stuck on my corkboard as my holiday hand print! It took a few tries to make sure there was enough coverage and not a lot of globs between fingers, but then there was nothing to do but slap her little hand on the fabric and give it a moment press. I am so very tempted to try and do this with the pets, but with my temperamental cats I know better!


The oversize tag where I wrote the to and from for the jumbo present that my niece also wrapped unfortunately isn't my favorite. Purple was the only marker that showed on the fabric, and though it compliments the yellow, it looks too fuzzy to me. In hindsight, a darker fabric may not show through the cardboard so much and might have really let the subsequent yellow paint and any print pop. The cardboard for these ornaments will probably bend, and I wouldn't put them near hot holiday lights. Certainly, the found materials are cheap, but the captured moment is priceless. None of the receiving family members were worried about finite crafting, especially thanks to my exceptional wrapping and ribbon curled gifts presented by said niece. She drove in her Pumpkin Car, played with her Cardboard Castle – wondering why it didn't have a door? – and tried on some of the costumes in the Victorian Guest Room's costume closet. She said they were too big and I gave her an old Simplicity pattern catalog to mark all the costumes she wanted to make. I guess I need to get cracking now!


Granted this holiday write up is belated. I had originally intended to do this for Mother's Day 2023 just before the turbulence of the year really hit when one of the mothers who previous received my Memento Mori Sewing and deserved a hand print of her own unfortunately passed. As my own health declined, August birthdays also came and went so instead these hand prints became my only handmade gift for Christmas. It's nothing new, but fortunately, this one day, free, timeless idea can be for any occasion – birthdays, valentines, an egg print for Easter or leaves in the fall.


For more photos, follow Kbatz Krafts on Instagram or Facebook or visit our Archive for more including:


Cardboard Halloween Banner

Mother Christmas Costume

Autumn Riding Habit


Monday, December 18, 2023

Going...Green?


Since I am feeling somewhat festive and evergreen, here is a brief, philosophical post on some of my holiday crafts and woulda coulda shoulda projects now at the end of this turbulent 2023. Ho, ho, ho. 🀢🏻

First, bling! Part of the fun in jewelry making is having something customizable for every outfit or occasion. Although I have fine jewelry I often save for the holiday season, December is also the month when I wear green accessories. Sometimes I will wear a red sweater with a festive brooch, but that is pushing just a bit too much color on my black if merry heart. Upon realizing that my nicer jewelry was maybe also a bit too much for my usual errands to the thrift store and grocery shopping – and yes there was a part of me that also whispered So What if they are! – I decided to make some more simple green sets. I haven't done much jewelry making this year, focusing on making a dent in my sewing stash instead, but as mentioned in my old Jewelry Making Video, having the beads, hooks, elastic, pliers, and supplies on hand is invaluable in being able to make the earrings, necklaces, or bracelets you need to fill out or compliment what's in your jewelry box.


These were cheap beads, plastic green baubles and second hand fireballs with my personally required cross charms as needed. I do however, have to keep a list on my cork board of what sets I've already made, what colors or metal combinations I do need, and whether I have already made a particular earring, necklace, or bracelet with a cross because yes, I have mistakenly made a few jewelry sets that are kind of, well, almost exactly the same! This December I knew I wanted a few smaller cross earrings, a green and gold set, and some light green accessories. Sometimes, the amount of beads themselves indicates whether I will have an entire coordinating set with earrings, necklaces, and bracelets, but sometimes I have to tell myself it is okay to not be so matchy matchy.


Did I still end up with something kind of fancy because I used some shiny fireball beads? Sure.

Were the gold beads probably cheap looking and gaudy? You betcha!

Did I drop the chain and have to do the double light green necklace three times before I got the layered look right? Yes.

Am I already thinking about January's purple accessories and making more bling? Absolutely.


Of course, the piΓ¨ce de rΓ©sistance this month was my second wear of the Mother Christmas Costume! This year the three year old niece was interested for maybe ten minutes (instead of last year's five) thanks to the wooden nativity puzzle Mother Christmas brought her. Thanks to this year's health issues, I've actually lost enough weight that these custom clothes are now too big, so this time I wore the leather belt cincher with the lacing in front so I could drawn it almost entirely closed. I did lose a bead on the cuff in doing so and still needed help getting into the whole thing, which now seems cumbersome in its too big-ness. Next year I may need to add some snaps or hooks connecting the hooded bodice to the skirt so there is no loose gap between them, or more ambitiously, I may sew them together as one if I need to do further taking in fittings. My niece asked why I was in a costume to look like Santa, and when I asked her if she wanted a costume next year, she said yes – choosing princess over elf and wanting to be dressed in red like Santa with yellow her favorite color. Another large project I don't need to tack on to my hitherto unknown 2024, yet I already have ideas for the perfect holiday meets forest meets child Tudor ensemble! She was also very impressed with the staff originally made for my Halloween Mystery Costume and tried to take it home with her.


Isn't that the real reason we costume? It's often frustrating when you work on creative projects for timely reasons, either seasons, deadlines, or algorithms. With the perfect storm that was 2023 for us, most of my projects were put on hold yet got me through the difficult times. I have 6 months worth of vlog videos on several complicated sewing and patterning projects – which as I wrote in upcoming piece in the Winter Issue of Search Magazine, kept me going one stitch at a time.


When will the internet see these videos? Who knows?

Was rushing to put my creativity on the internet in order to watch it sink like a stone with precious little views or notice my main goal in these projects? No.

Is that bad? Maybe not.


So here's to 2024 being more manageable with the right outlook in artistically braving any upheaval. πŸŽ‰


Follow us on Instagram or Facebook and visit our Kbatz Krafts Archive for more including:


5 Skirts from 1 Pattern

Painting My Sneakers Black

Making a Cardboard Castle

Memento Mori Sewing